Copper Red Glazes: The Elusive Bright Red Pottery

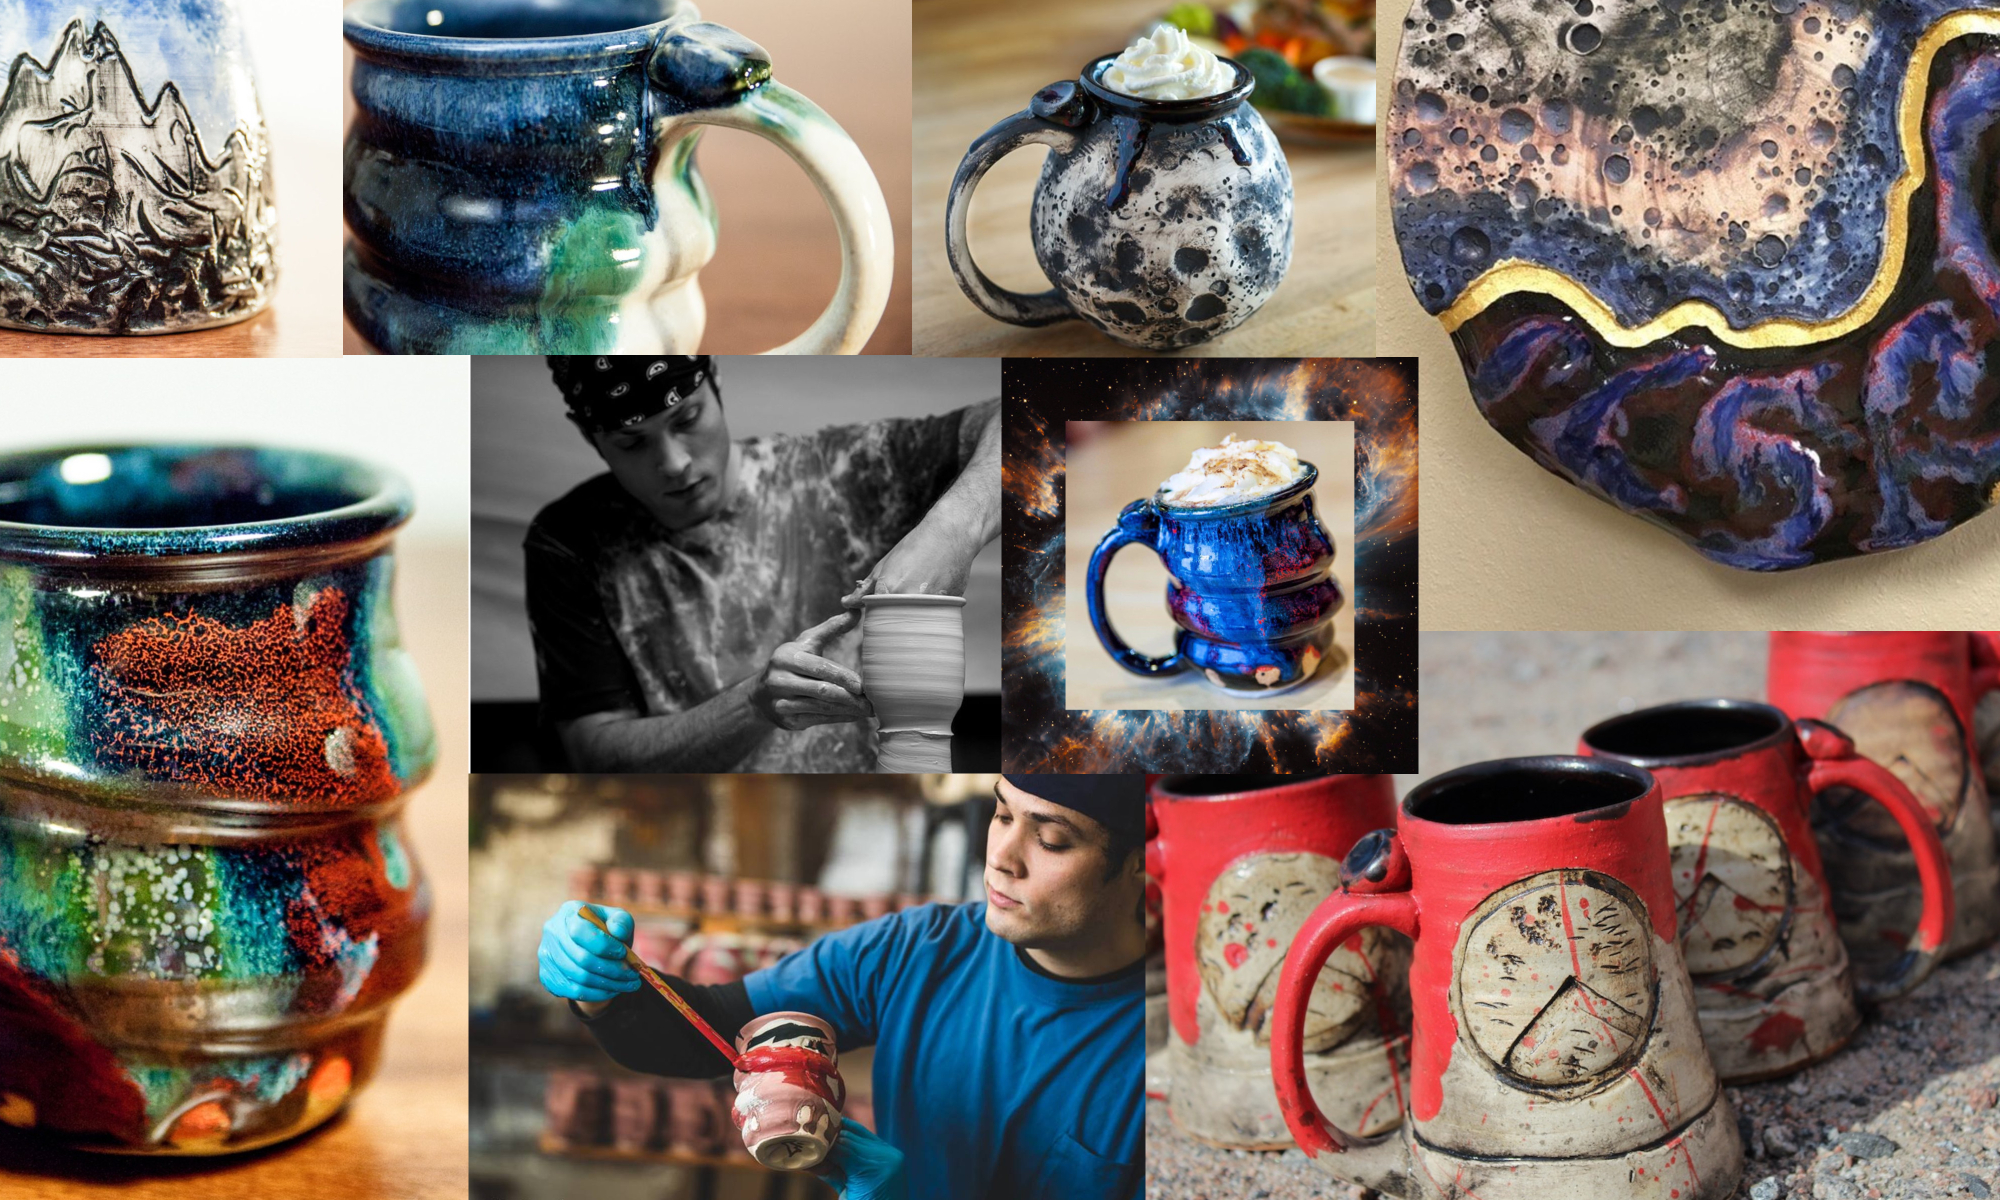
I’ve been exploring Copper Red glaze recipes for about 2 years now, and I still don’t know exactly what causes the reddest of red glazes.  Some recipes are consistently dull liver color, yet they will blush orange-red from time to time, like the mug pictured to the left.  It was in a firing that did not have enough reduction.   A lot of the pottery was mostly green, like the right side of this mug.   For some reason this pot has an awesome red-orange racing stripe down the side right where the green transitions to red.   Was it because the flame was hitting it in a weird way?  It wasn’t even close to the burner ports….

“Copper Red Glazes” by Robert Tichane is the best resource I’ve found for Copper Reds.   If you want to learn about reds I say read it, then read it again.  He suggested that any base glaze can be adapted to a Copper Red glaze by adding 2% Copper Carbonate and 3% Tin Oxide and then firing in a reduction atmosphere.  This inspired the above glaze, which was originally an Elaine Coleman Celadon that I found in an old Ceramics Monthly.  I added the Copper and Tin, as well as a bit of EPK to raise it from cone 9 to cone 10.  Here’s the recipe, and don’t forget to glaze very thick!!

Copper Red/Elaine Coleman Celadon
Whiting
21.0
Custer Feldspar
25.0
EPK Kaolin
20.0
Silica (325-mesh)
25.0
Ferro Frit 3134
8.8
Zinc Oxide
2.7
Tin
3.0
Copper Carbonate
2.0
Bentonite
2.0
Talc
2.0
Total:
111.5

Another book that’s super helpful for Copper Reds, and just about every other glaze at Cone 9-10 is “The Complete Guide to High-Fire Glazes: Glazing and Firing at Cone 10” by John Britt.  Buy this book, seriously.  I learned most of what I know about glazing from this book.  John also describes a bunch of his techniques all over Youtube, here’s a great one for glaze testing:

Easy Glaze Testing (color blend) (part 1)

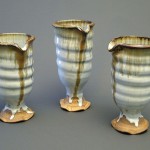
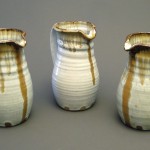
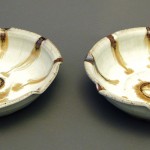
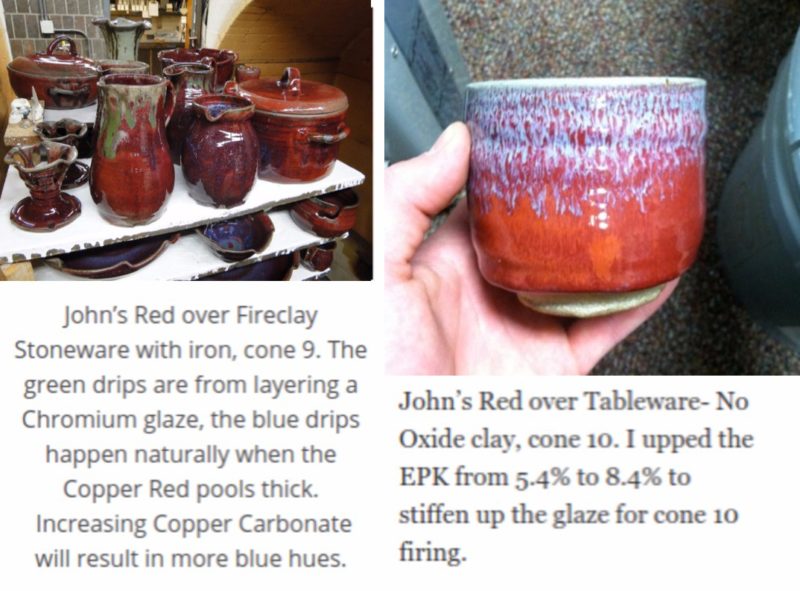
The images below show the “John’s Red” glaze on stoneware. It’s also important to note that John’s Red glaze is much more vibrant than the above glaze (Copper Red/Elaine Coleman Celadon), which is often liver colored, or muddy brownish red.  I wonder why???

The left image shows John’s Red at cone 9 over Fireclay Stoneware with iron.  I really like these dark burgundy reds, but recently I’ve switched to “Tableware- No Oxide” clay from Continental Clay, which is a white stoneware with very low iron content.  It helps brighten up the reds, like the cup shown on the right.  The rim was also dipped in a Nuka glaze, which ran down the pot during the firing.

Here’s the recipe I’m working with.  It’s John’s Red, but I increased the EPK from 5.4% to 8.4% to stiffen up the glaze for cone 10 firing:
John Britt Red, cone 10
Custer Feldspar
96.4
Whiting
27.2
Silica (325 mesh Flint)
31
EPK
18
Frit 3134
18.2
Talc
7.2
Zinc Oxide
9
Tin Oxide
2.4
Copper Carbonate
1.9
Bentonite
2
Total
213.3

Nuka is an ash glaze.  Check out “Ash Glazes” by Phil Rogers for some great recipes and info on ashes.  Nuka’s are so awesome that they deserve an entirely different blog post, so I’ll just give you the rundown on the recipe I’ve developed over about 2 years.  I get wood ashes from a friend with a wood stove and dry sift them through 12 mesh, then again through 40 mesh.  The glaze recipe changes with the type of wood ash and the sifting process, but here is my current cone 10 recipe…although it’s likely to change because right now it looks a lot better at cone 11:

Nuka, 4/23/12
Wood Ash
33
Custer Feldspar
50
Silica (325 mesh Flint)
30
Whiting
20
Bone Ash
20
Bentonite
10
total
163

Firing is another crucial component to Copper Reds.  Currently I fire in a large natural gas kiln with about 30 cubic feet of stackable space in about 10-11 hours.  I essentially use John Britt’s Reduction 1 firing cycle with a few tweaks.  I fire oxidation until cone 010 drops (about 1700 degrees F) and then do 30 minutes of heavy reduction- the kiln usually stalls in temp.  Then, I fire in mild to medium reduction until cone 10 is very soft.  I’d say more reduction is better than less here. I’ve yet to see adverse effects from over-reducing but I have gotten green from under-reducing.  Lastly, I open the damper and put the kiln into straight oxidation for 30 minutes, until cone 10 drops and 11 is soft- then shut down with the damper closed.  Robert Tichane writes about the importance of peak temp. oxidation for bright reds, and I’ve seen great results with this technique.

Now go mix up some glaze and start chasing the red!

BIG Pottery: Coil Building and Stacked Sculptures

Coil building was one of the first pottery techniques I learned, but it’s not something I do everyday or even every month. I like to use coil building for HUGE pots that are too big to throw.

I generally throw the bottom of the pot as big as I can, usually with a 20-40 pound lump of clay. The image on the left shows a pot that was thrown from 25 lbs. of clay and about 12 inches high, before I coiled up another 12 inches.

It’s a lot easier to coil a narrow shape than a wide shape, as wider pots tend to get off-center and want to collapse. I add the coils on top of each other by pinching the new coil into the clay below. My thumb leaves an interesting pattern from this process, and I generally keep this texture as decorative banding lines in the large jars. The image on the bottom left shows the coils after they have been smoothed together. You can see how the smoothing process also begins to form the pot’s profile.

Compared to throwing a pot on the wheel in a matter of minutes, coil building is a much slower process.  The profile of the pot forms over a matter of hours, as the 2-3 foot long coils are individually rolled out and successively added on top of each other.  The pot below was made with extremely thick coils to form a planter.


I started with a 35lb. mound of clay for the bottom, thrown 1.75 inches thick.  I left a hole in the middle for water drainage in the finished planter.  Then, I rolled 2 inch thick coils and paid careful attention when smoothing them together.  The finished planter used about 410 lbs. of clay and with the help of some Red Hot Chili Peppers on shuffle, this pot formed in just under 5 hours.  About 100 lbs. of water will evaporate from the clay before the firing, hopefully over the course of 2-3 months to avoid drying cracks.

Another way I often build BIG pots is by throwing pottery shapes, like large bowls and cylinders, and stacking them on top of each other. These combination stacks grow a lot faster but I tend to make these pieces a bit smaller and reserve coil building for the huge pots.

Glaze testing at JD Jorgenson Pottery

I’ve spent the past week and a half firing the small gas kiln at JD Jorgenson Pottery, in order to accomplish a couple things with the Nuka glaze.  At the St. Ben’s ceramics studio, I fired the glaze to cone 12 flat, almost cone 13 (about 2410 degrees F).  At these temperatures, it takes a long time and huge amount of energy to raise even a single degree.  It’s also harder on the kiln, shelves, and clay so it made a lot of sense to try and lower the temperature of the Nuka glaze before my new body of work.

The kiln at JD’s place was made from the shell of an old electric kiln that I salvaged from a high school in Sartell, MN.  They kept the electric box, so JD cut 2 small holes in the bottom of the soft brick to make burner ports.  Firing with gas instead of electricity will also let us test reduction firings very similarly to larger gas kilns.  These practice firings willhelp me for adapting to the Paramount Arts Center gas kiln, which I’m firing for the first time this Monday.  Fresh pots should be out by Art in Bayfront Park the next weekend in Duluth!

My first firing in this kiln was actually the second time JD fired it, and we got some really nice results.  The glaze fluxed out pretty well at cone 10 (that was our goal) but the bottom of the kiln only reached cone 9.  Also, even at cone 10 there were bubbles present in the glaze.  The Nuka contains wood ashes, which are high in alkali.  Something about the alkali cause bubbling in the glaze at high temperature, and the finished pottery had sharp holes and pits.  Problems like this are common when working with earthen materials, but the struggle is well worth the rustic tones and philosophies behind working from a waste stream system.

Here’s a few finished pots from the 2nd kiln firing, as well as some underfired ones.  The pieces on top are almost perfect, except for the bubbling where the glaze pooled.


JD and I learned a lot from these pots, but with a 22 hour firing into the night I wasted a lot of time and energy with the stalled out kiln.  The barometric pressure changes every night, and this generally makes it difficult to gain temperature.  Once the sun went down, we were at the mercy of the kiln to go at it’s own pace.  Night firing makes for some cool pictures, but a miserable next morning.

Right now I’m in the middle of the 3rd firing and the kiln is at cone 5 (almost 2200 degrees F).  Once it gets to cone 10, I plan to soak for at least 2 hours, so the bubbles will pop and the glaze will seal over.  At 6 hours in, we’re really close to peak temp and the soak period so things are looking good…definitely better than another firing into the weee hours of the morning uuhg…and hopefully the pots will turn out looking close to this good!


ROCK! Music that makes the wheel go round.

Rock is definitely my favorite type of music to throw to.  After a few hours of Red Hot Chili Peppers I just feel like I made more pottery than if I had been bobbing my head to Mr. Sunshine on my Shoulders, John Denver.  I do think mellow music can be great for detail work or anything tedious.  For example, when I mix and test new glazes I like some old Coldplay, like High Speed.  Here’s an image from a bunch of testing that I did during my senior thesis in Spring, 2010 on the Nuka glaze:

I’ve never been a fan of tedious work that takes a lot of concentration.  I’ve made tedious work even since freshman year in college, but I like to work fast.  I made this one for a cardboard project in our Intro to 3D Design class.  It was partly the result of a whole lot of Smashing Pumpkins.


In Spring 2009, I went to Northern Arizona University to see 6 artists at a 2 day workshop. Don Reitz really stood out in my head because of his style of working and because his sculptures seemed really fresh.  His process reminded me of drippy paintings by Jackson Pollock.  This is my favorite way to make artwork: fast and direct.  With Abstract Expressionism, you go with the flow and surrender to the process.

Don-Reitz-Throwing-3-Images-Joel-Cherrico-Pottery-Abstract-Expressionism-in-Clay-Flagstaff-AZ

For me, the Red Hot Chili Peppers embody this artwork in their music.  Anthony Kiedis belts out catchy vocals and lyrics hidden in random sentences that would be grammatical nightmares.   Flea’s bass lines have a huge presence in every song, and they meshed perfectly with John Frusciante’s melodies and Chad Smith’s loud, fast beats- good luck finding a drummer that hits his drums harder. The band writes each song from jamming- just rockin out together and letting the music flow.  With Frusciante now pursuing his solo career, he trained in little Josh Klinghoffer to live up to his legacy.  After releasing their new single I’d agree with Rolling Stone that their “juicy funk-pop groove” isn’t going anywhere.  I have a feeling I’ll still be throwing pottery and sculpture to the Chili Peppers for decades to come, hopefully with the same energy embodied by their music, Abstract Expressionists and my Mindscape sculptures.

Take it from Dave Grohl, drummer of Them Crooked Vultures and lead singer/guitarist of Foo Fighers.  He rocks with the best of them and knows there are few things in this world that can get you going like a heavy rock song.  Well, maybe a FRESH POT!! 

Pottery Production, Year 2

Guest blog posting by Matt Staz

As of recent, Joel Cherrico has moved from the residency at Saint Ben’s to another studio located in the heart of downtown St. Cloud, The Paramount. Saint Ben’s has been mother’s milk to Cherrico pottery, a refuge for this clay slinging potter, however, as the tides change and the phases of the moon advance, so must Cherrico pottery. The Paramount will become the fortress from where the clay of the earth turns into functional vessels. Before bidding the Saint Ben’s Studio adue, a few projects for his Artist Residency were fired in the kilns at Saint Ben’s. The first included in total: 300 modest slim formed Communion cups, 2 immaculate pouring vessels, 2 pitchers and 2 bowls.

The other project was made for a Saint John’s Groom and Saint Ben’s Bride. Included was a 6 person tableset (6 medium plates, 6 dinner plates, 6 coffee mugs and 6 bowls) for a wedding Registry. Check it out on Etsy– it’s like Ebay, but entirely handmade (entirely awesome):

http://www.etsy.com/people/joleneandjohn

The new shift to The Paramount will produce new work from the same ilk. The artists’ community found at the Paramaount will bring forth a new threshold to the ever evolving techniques, styles, and form of Cherrico ceramics.

Cherrico’s ceramics can be viewed and purchased at the Paramount Gallery. On the tables of crystal glass, vessels and forms of all kinds sit in await of peoples attention. The Milky Way galaxy swirls of glaze draw people in from the main drag in downtown St. Cloud. Mugz are adorned with a Nuka glaze that begs for you to pour a bold hot coffee into it. And the serving bowls, wide deep as the Continental Divide basin, are ready for use at a summer event at the lake cabin or a get together in your home. Come in, stop on by, check out this display of pottery, and by chance you may meet the artist himself at the Paramount Gallery
The styles that are hatching from the new Residency at The Paramount Center for the Arts are creative and breakthrough. Shapes and forms are being experimented on to best honor the suite of Ceramic enthusiasts. Working all through day, and into the night, the artist plugs into the funky cerebral music and starts another fresh pot of coffee, in order to find forms that can jigsaw worldly tastes.