Cosmic Pots: The “Goldilocks Glaze”

Thirty-four years ago, astronomer and Cosmos host Carl Sagan made his famous claim:

“If you wish to make an apple pie from scratch, you must first invent the universe.” – Carl Sagan. “The Lives of the Stars.” Cosmos: A Personal Voyage. PBS. 1980.

Sagan could have been talking about making anything from scratch. His goal was to convey that everything on earth, everything in the universe, is made up of precise combinations of the most basic elements, and those elements were created in stars’ nuclear cores. We could also say, “If you wish to make a pot from scratch, you must first invent the universe.”

These star-forged elements combine to form all the components of ceramics: the different strains of clay (silicon and iron), the water used in throwing (oxygen and hydrogen), the arboreal ingredients of glazes (calcium), and even the potter himself (carbon). Entire books could be written focusing solely on one of these ceramic elements.

copper red glazes pottery robert tichane cherrio pottery
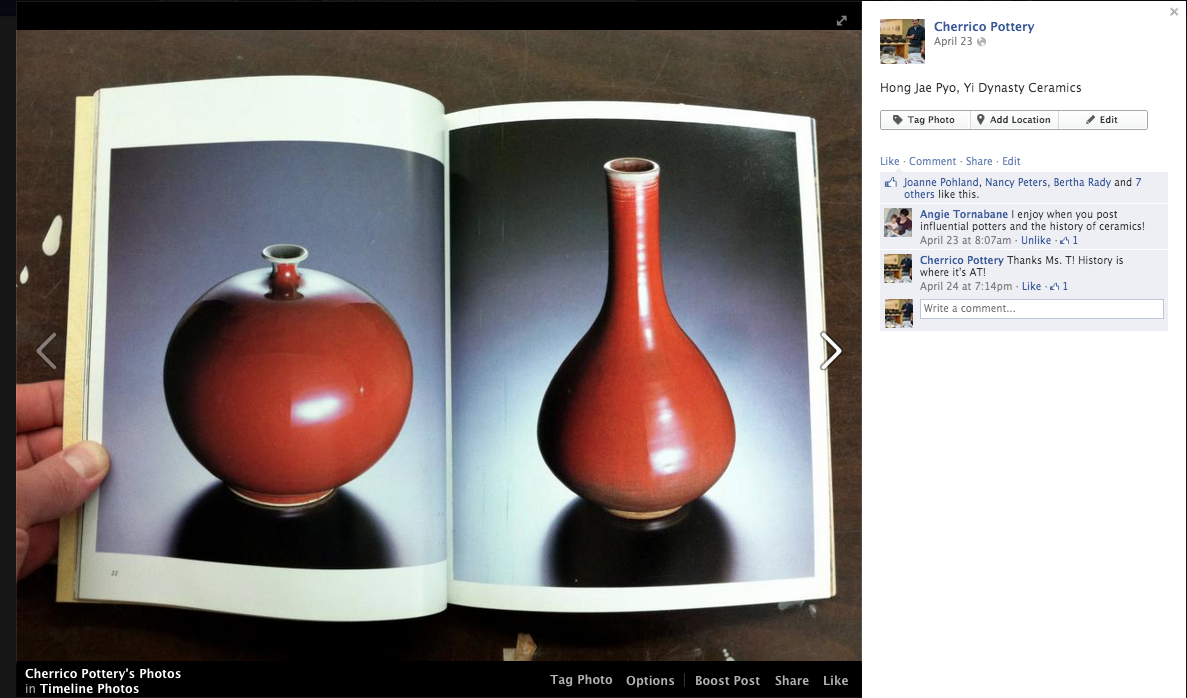
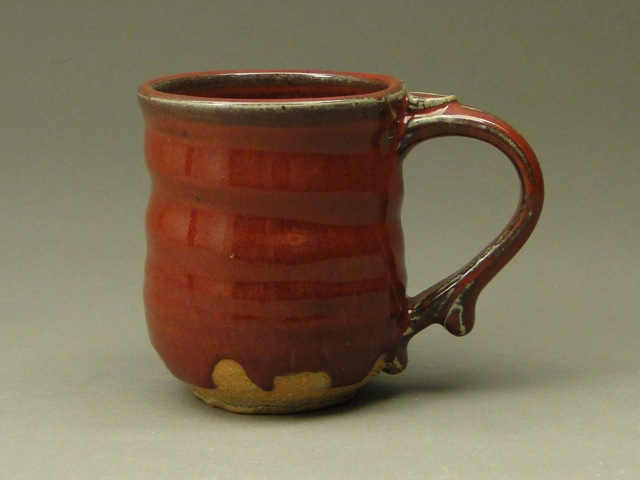
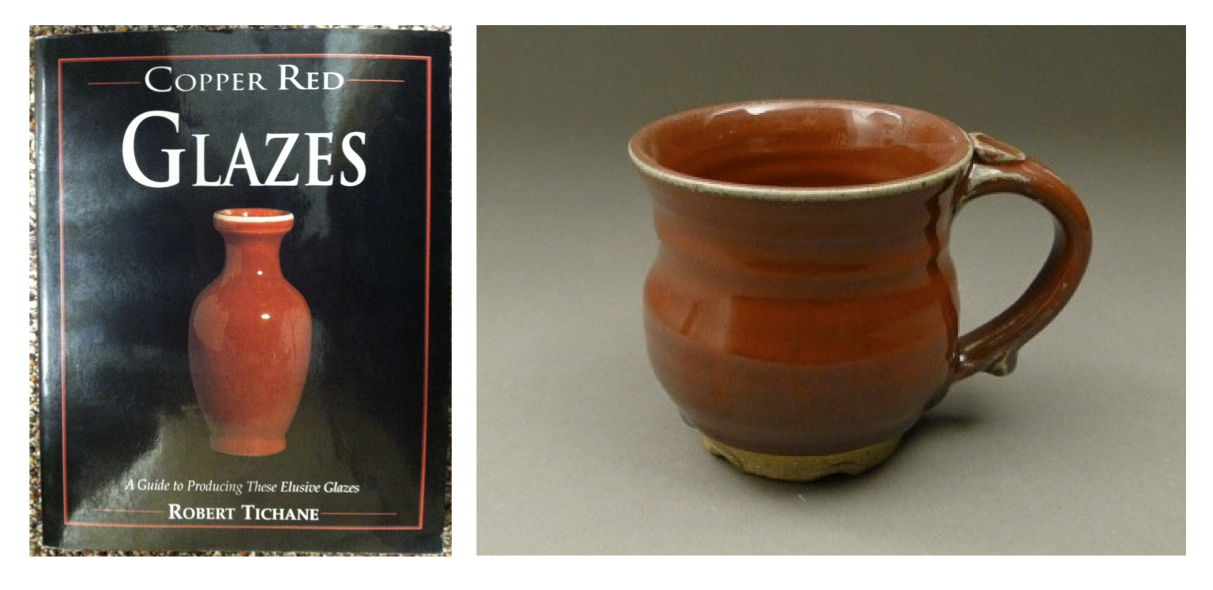
Copper, for example. Copper red glazes have been meticulously pursued and produced since the fifteenth century in China. The new host of Cosmos, Neil deGrasse Tyson, often analyzes the concept of a “Goldilocks planet” – a planet which has the precise conditions for possibly sustaining life. A successful copper red glaze is a “Goldilocks glaze.” Everything in both the recipe and the firing must be perfect.

Joel Cherrico Pottery, Copper Red Glazes, Gas Kiln Firing
Caution: No room for error.

As Sagan and Tyson have taught us, science is found in everything we do. Baking an apple pie from scratch, developing a new drug, and mixing and firing glazes all rely on experimentation, creativity, and chemical reactions. A potter doesn’t need a degree in chemistry, but he uses some pretty cool science to produce copper red glazes.

Copper Red Pottery, Stoneware Wheel Thrown Mug, Cups, Handmade Pottery, Handmade Ceramic Pottery, sku 427, Image 5
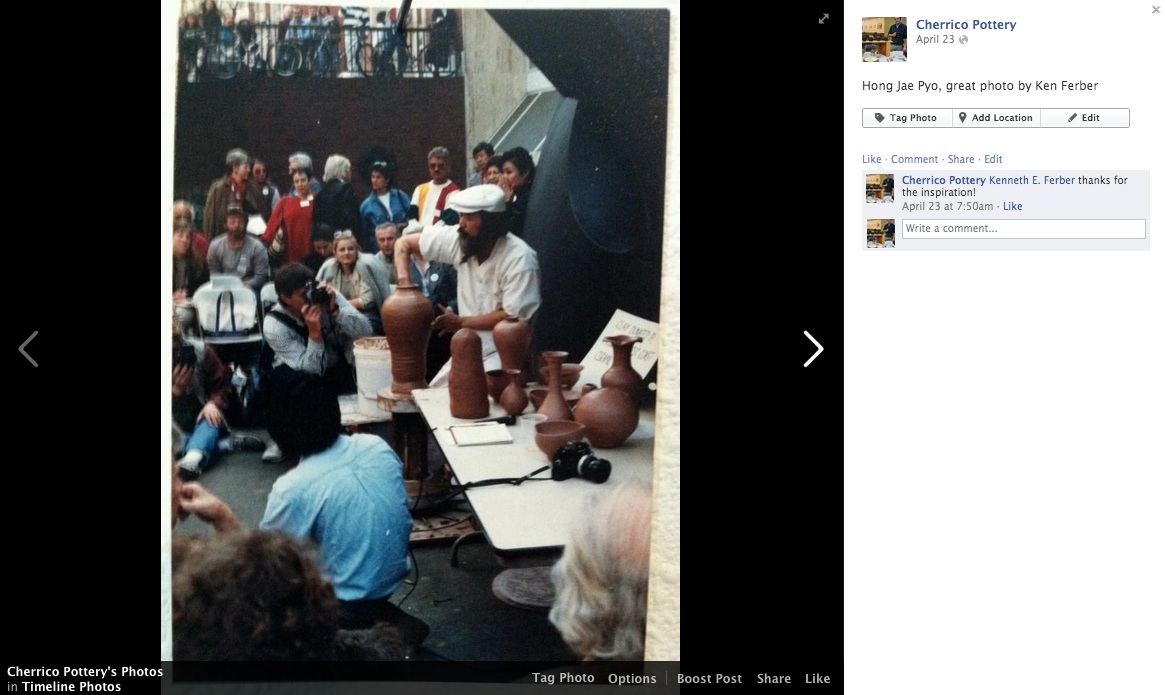
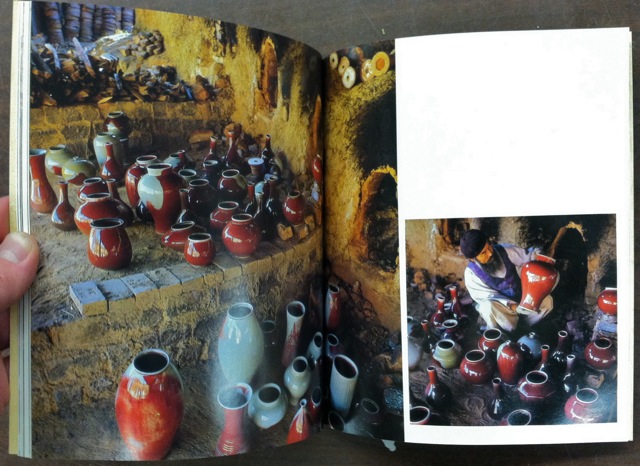
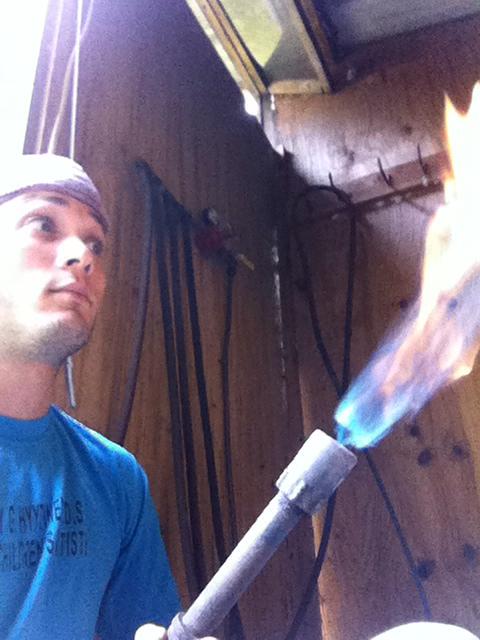
Nowadays, gas-fired kilns produce the best conditions for copper red glazes, but ancient Chinese potters created their beautiful pieces using only wood-fired kilns. Many potters do not have regular access to gas- or wood-fired kilns, and use electric ones instead. Electric kilns eliminate the need for constant temperature monitoring, but they are unable to create the atmosphere copper red glazes require.

48 x 40 in. wall poster for Handmade Grounds
Hello in there!

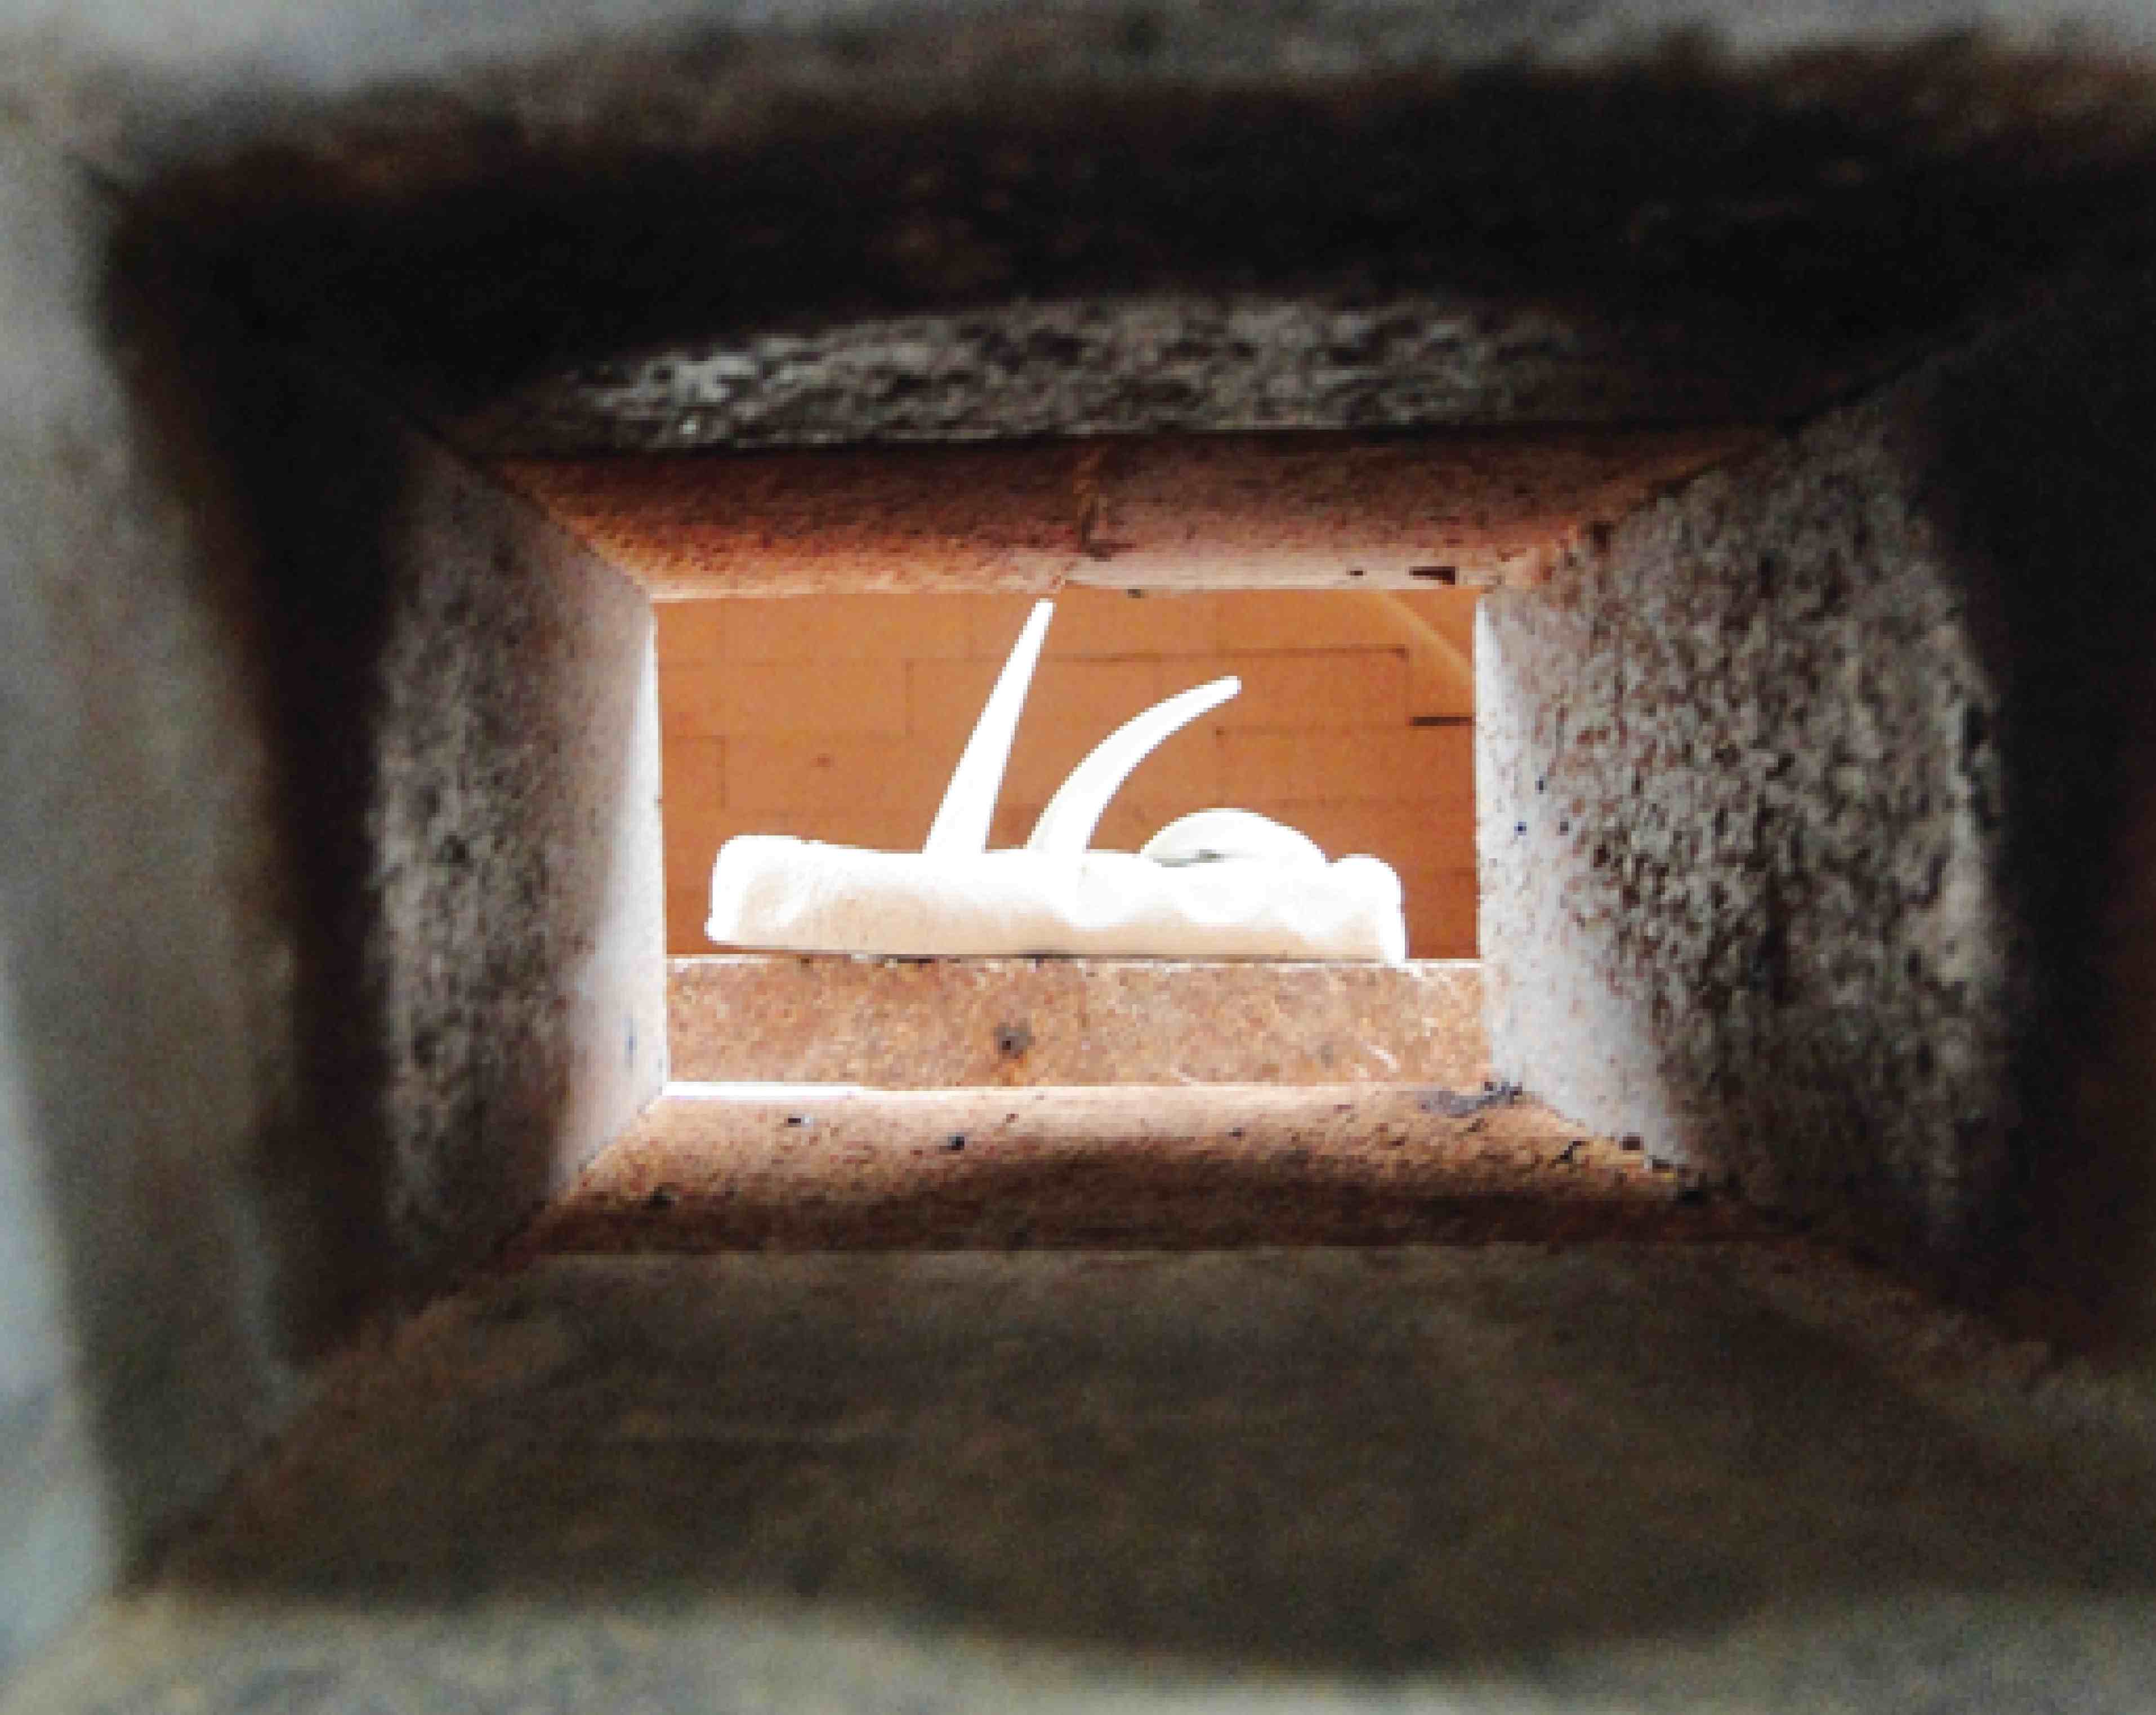
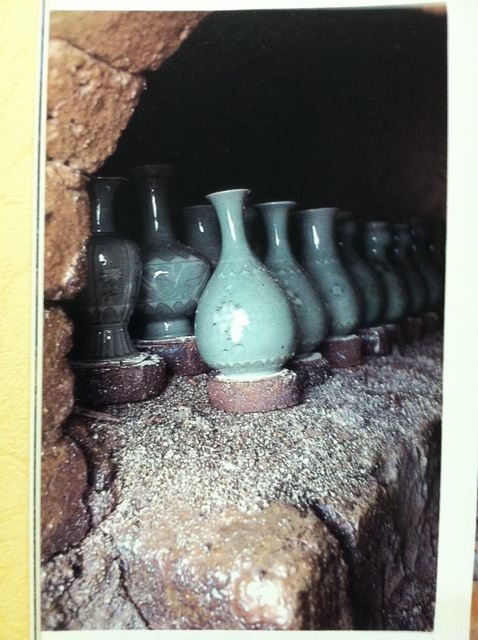
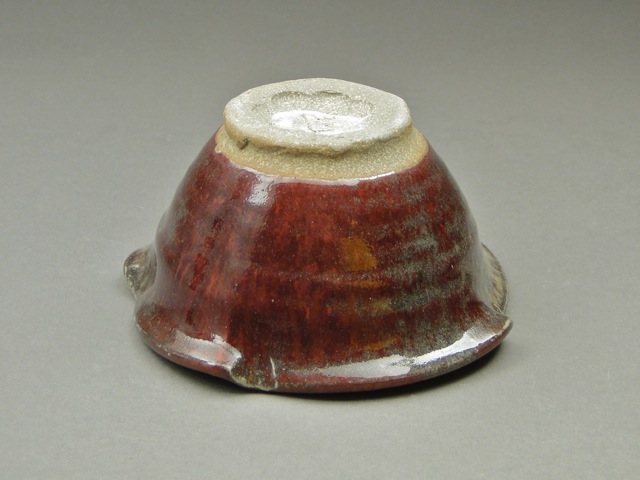
Copper red glazes need to be fired to a temperature called “cone 10.” This photo shows three cones (small pieces of clay), set up inside a gas-fired kiln. Each of these pieces is made from a different factory-produced type of clay formulated to melt at a certain temperature. A device called a pyrometer can be used to measure the temperature of the air inside the kiln, but what really matters is the temperature of the clay, hence the use of cones. When cone 10 melts, the potter knows the clay is roughly 2345 °F.

Handmade Pottery Ceramic Copper Red Bowl, Wheel-Thrown pottery, Handmade Stoneware, SKU 445, Image 3

Stoneware Wheel Thrown Mug, Cups, Handmade Pottery, Handmade Ceramic Pottery, sku 426, Image 1
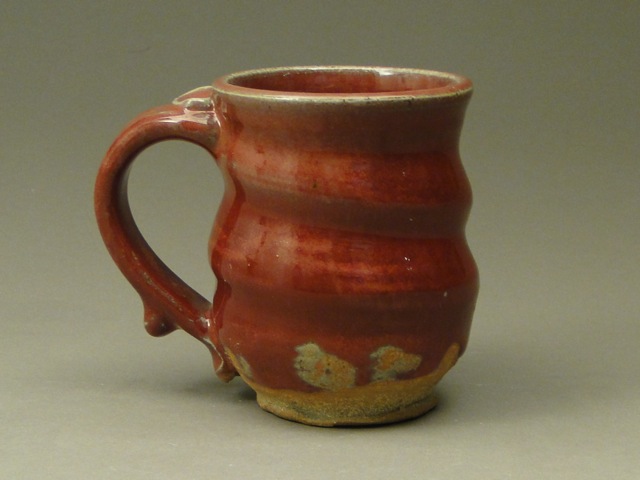
Even inside the same kiln, the atmosphere unavoidably varies. The pots below all had the same glaze and firing, but were placed in different areas of the kiln.

Copper Red and Green Glazes, Joel Cherrico Pottery Cups  
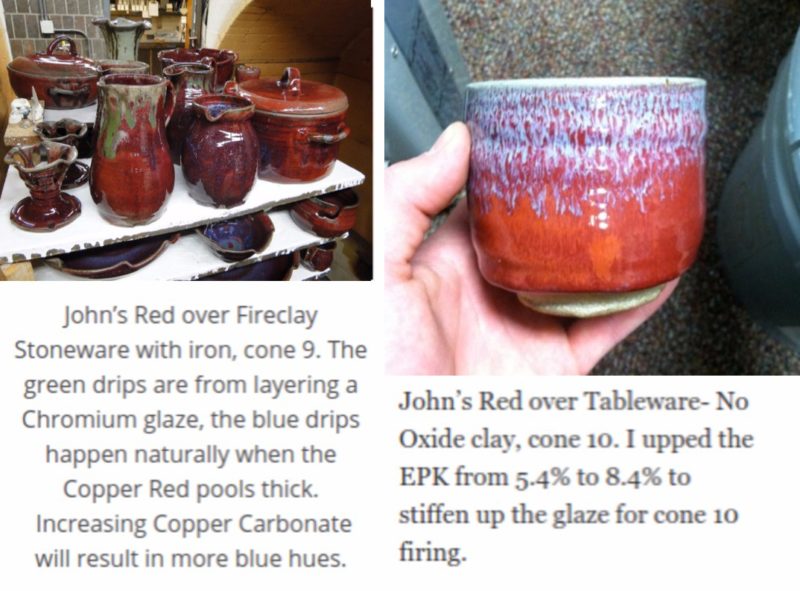
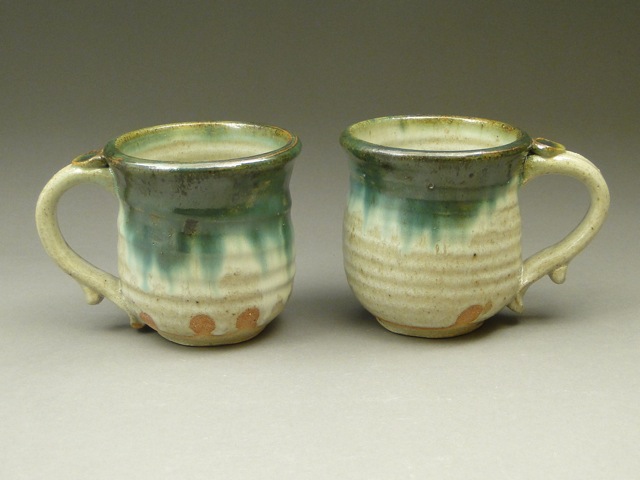
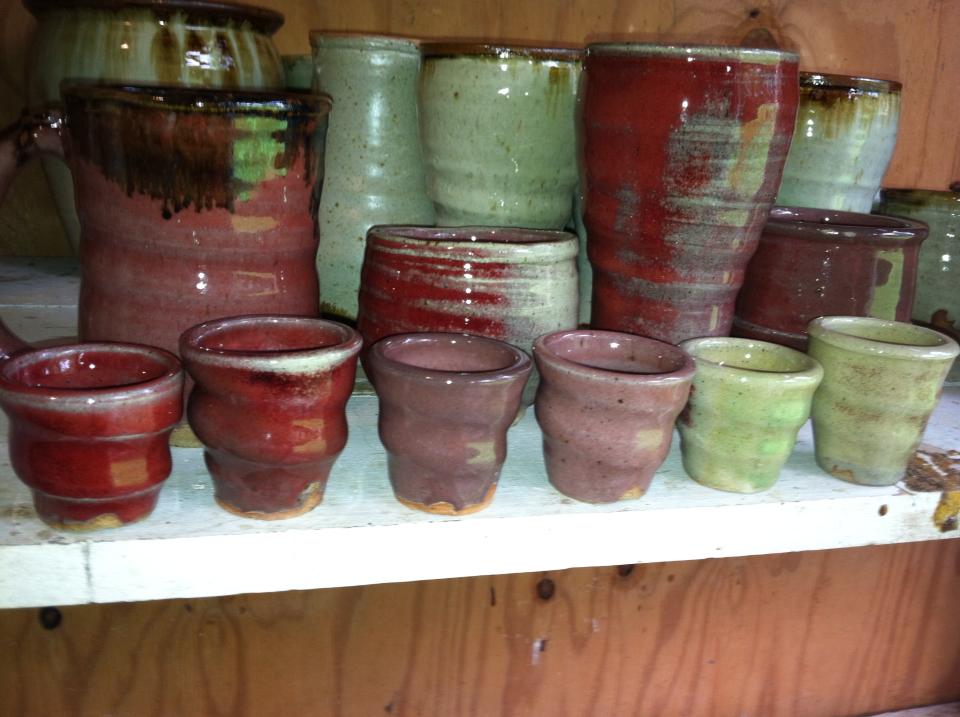
The green color on the right also occurs when firing a copper glaze in an electric kiln.

Handmade Pottery Stoneware Mugs, Wheel-Thrown pottery, Handmade Stoneware, SKU 438, Image 1Glazing Pottery, Copper Carbonate Stain

Color, just like copper, depends on the stars. Light from our sun strikes objects on earth, and those objects absorb some wavelengths of light and reflect others. The wavelengths they reflect are the colors we see. As Tyson puts it:

“Color is the way our eyes perceive how energetic light waves are.” – Neil Degrasse Tyson. “Hiding in the Light.” Cosmos: A Spacetime Odyssey. Fox. 2014.

Thankfully, potters did not have to create the universe to make pots from scratch. Their ingredients are already present in the cosmos, swirling in the air and lurking in the earth, waiting for them.

Handmade Ceramic Pottery, Joel Cherrico Pottery, Copper, Cobalt, Iron, Glazes, Pottery

Chuquicamata Till Niermann
Chuquicamata Copper Mine in Chile. (Image: Property of Till Niermann, located in the Wikimedia Commons.)

Not Your Typical Cold Call: An Inspiring Conversation with an Elder Potter

Last Wednesday afternoon I was attaching some handles to mugs and I got a strange call from a number in New Hampshire. Normally I let out-of-state calls go to voicemail because it’s often spam. For some reason I decided to wipe the clay off my hands and pick up.

The man on the line was Bruce Dix. He was Google searching a potter named, “Hong Jae Pyo” and he discovered my work. He asked, “Have you ever met this guy? Did you host him at your studio?” I said, “Bruce I don’t really have a studio, today I’m making pottery in my 3rd floor apartment. I’m only 25, I got the pictures of Hong Jae Pyo from a friend and just put them on my facebook.” Then Bruce said, “Oh so you’re a young guy, huh? Well I’m 65 and I’ve been a potter my whole life. I’ve gotta give you some advice while I’ve got you on the phone.”

This was the start of an hour long conversation about Bruce’s life as a potter.

The internet is so crazy. Hong Jae Pyo was a Korean potter practicing Yi Dynasty ceramics, and he toured the U.S. in the late 80’s. My only relation to him was by posting 2 images of his work on my Facebook page, because I’m really interested in his Copper Red glazes…we’ve never met, we’re not “tagged” together in any pictures. I simply typed “Hong Jae Pyo” as the image description and it was enough for Bruce to find him in Google, find my phone number on my website, and shoot me a call.

Hong Jae Pyo, Pottery Throwing Demonstration, photo by Kenneth Furber    Hong Jae Pyo, Pottery Throwing Demonstration, photo by Kenneth Furber, 2

Bruce went on to describe the time he spent with Hong Jae Pyo and 2 other Korean potters that were on tour with him.

“They were traveling to colleges to give demonstrations, eating Coke and Pizza, I could tell that they were really uncomfortable. They lived in small Korean villages with locally grown, good food. I invited them back to my place and cooked them a feast.”

Bruce went on about the potters. “I had porcelain, stoneware, and terra cotta. Each potter used a different clay and we made pots for days. They spent time by the ocean, walked around outside, away from the city. They were really humble, nice people.”

Our conversation shifted to Bruce’s life and his desire to give me advice. I don’t remember everything he said word for word, but here’s what I took away from our conversation:

Pottery Insurance

“Take your best piece from each firing – the jewel – and put it in a box. In 20 years, you’ll have a show of these pots in New York City, sell $100,000 and be able to retire. Plus, you can pull these pieces out from time to time for inspiration. It shouldn’t be hard to keep from selling these pots right away. You have family heirlooms, you don’t try to sell these, right?”

$0.25 Mugs

“When I was your age, I sold my mugs for 25 cents each. If you can get $25 per mug then you’re doing great, keep going!”

No Art Festivals

Bruce never did a single craft fair.

Word-of-Mouth

“Eventually all of your customers will come to you, it just takes time- years and years. Try unconventional ways to sell your pots. Call one of the big banks in your city and politely ask to speak with someone in charge of marketing and corporate gifts. Put on a white, clean shirt, white pants, and bring them some of your pots.”

Colleagues, Not Competitors

“You should never have competitors, you’re never competing against other potters. Find the potters that you have similarities with and spend your time with these potters.”

Ignore Criticism

“As your career builds, you’ll start to get a lot more criticism. Ignore people who criticize your work. Don’t let it bring you down, just go find like-minded potters.”

———————————————————————————————-

You won’t find Bruce’s work online, he’s not interested in giving up privacy to get his pots out into the world.

Special thanks to Ken Ferber for originally sharing the images of Kong Jae Pyo that he snapped during a 1988 workshop. Ken let me photograph his images, as well as sections of a book that he bought during the workshop.

Joel Cherrico Blog Post, Bruce Dix, Kenneth Ferber, Rolling Stone, Jimi Hendrix, www.cherricopottery.com 01    Joel Cherrico Blog Post, Bruce Dix, Kenneth Ferber, Rolling Stone, Jimi Hendrix, www.cherricopottery.com 02 Joel Cherrico Blog Post, Bruce Dix, Kenneth Ferber, Rolling Stone, Jimi Hendrix, www.cherricopottery.com 03      Joel Cherrico Blog Post, Bruce Dix, Kenneth Ferber, Rolling Stone, Jimi Hendrix, www.cherricopottery.com 04 Joel Cherrico Blog Post, Bruce Dix, Kenneth Ferber, Rolling Stone, Jimi Hendrix, www.cherricopottery.com 05     Joel Cherrico Blog Post, Bruce Dix, Kenneth Ferber, Rolling Stone, Jimi Hendrix, www.cherricopottery.com 10

Gas Firing Stoneware Pottery at Cone 10: Natural Variations in the Copper Red Glaze

My most recent gas firing produced some amazing color variations. The kiln was filled top to bottom with pots only glazed in my Copper Red glaze. About half of the pottery had great red colors, ¼ had great red but with color variation, and the remaining ¼ were mostly green, pink or gray.  The natural gas flame paints the glaze surface, and potters are blind to this process.

Thanks to my intern Samantha Thury for shooting these images. I many never know exactly how to produce the reddest of reds, but here are some of my guesses:

Bright red/red-orange: consistent reduction and temperature throughout the firing, slower flame path, less oxygen entering the kiln.

Burgundy: heavier reduction. Often gradates to violet, black and then clear.  Seen in areas of the kiln where uneven reduction causes flame to become trapped, and then simultaneously over-reduce and oxidize different areas of the same pot.

Gray-Pink: somewhat of a mystery…consistently seen on the left side of this kiln, and in certain other areas of the kiln. The flame could be slower, causing more reduction. Perhaps there is heavier reduction during a certain point in the firing. This color is often seen next to bright red, but rarely seen next to clear. This could mean that reduction is achieved before cone 5, but perhaps too much reduction is achieved.

Gray: transition color mostly seen from bright red/burgundy to clear, but seen here on a more red/pink to clear transition.

Clear: oxidized. The bottom shelf of most kilns usually results in clear, sometimes with hints of red or violet. Achieving medium reduction before cone 5 and through cone 10 could eliminate clear. I also see clear closest to the burner ports and target bricks, where the flame path is faster and more turbulent.

For all you potters interested in producing your own Copper Red glazes, check my previous blog post for my glaze recipes and firing techniques:

Copper Red Glazes: The Elusive Bright Red Pottery

Also check out “Copper Red Glazes: A Guide to Producing These Elusive Glazes” by Robert Tichane. Read the book, then re-read it! It’s been an enormous help in developing my red, and especially my firing techniques.

Glazing Handmade Ceramics at Cone 10: Painting with Fire

While I use brushes for much of my glazing decoration, the kiln does just as much painting as me. Unlike painters, potters have to give up some control of their artwork by using fire to finish the surface.  I brushed iron stain onto the rim of the mugs below, then the iron dripped down the walls during the firing.

Each pot is first dipped in a bucket of glaze. I chose glazes that move and drip during the firing. The image below shows how I brush colorants like iron or cobalt onto the surface.  This adds color contrast, and encourages drips and movement.

After glazing, my pottery is loaded into a natural gas kiln. This is basically a huge oven with no windows that heats to about 2400 degrees F. for about 12 hours.  After 2 days of cooling, I open the kiln with fingers crossed, hoping that the “kiln gods” gave some good colors to the pots.


The images below show how I use iron, cobalt and copper stains to add color and movement. I brushed them on as a vertical line, then the stains melt down the pot during the firing.  This big pot barely fit in the kiln- we had to take out a few of the floor bricks!


The Copper Red glaze is very responsive to the flame path in natural gas kilns.  The gaseous atmosphere produces red colors, while the clear/green colors show up where the pot was more oxygenated.  The flame naturally paints the glazed surface.


Copper Red Glazes: The Elusive Bright Red Pottery

I’ve been exploring Copper Red glaze recipes for about 2 years now, and I still don’t know exactly what causes the reddest of red glazes.  Some recipes are consistently dull liver color, yet they will blush orange-red from time to time, like the mug pictured to the left.  It was in a firing that did not have enough reduction.   A lot of the pottery was mostly green, like the right side of this mug.   For some reason this pot has an awesome red-orange racing stripe down the side right where the green transitions to red.   Was it because the flame was hitting it in a weird way?  It wasn’t even close to the burner ports….

“Copper Red Glazes” by Robert Tichane is the best resource I’ve found for Copper Reds.   If you want to learn about reds I say read it, then read it again.  He suggested that any base glaze can be adapted to a Copper Red glaze by adding 2% Copper Carbonate and 3% Tin Oxide and then firing in a reduction atmosphere.  This inspired the above glaze, which was originally an Elaine Coleman Celadon that I found in an old Ceramics Monthly.  I added the Copper and Tin, as well as a bit of EPK to raise it from cone 9 to cone 10.  Here’s the recipe, and don’t forget to glaze very thick!!

Copper Red/Elaine Coleman Celadon
Whiting
21.0
Custer Feldspar
25.0
EPK Kaolin
20.0
Silica (325-mesh)
25.0
Ferro Frit 3134
8.8
Zinc Oxide
2.7
Tin
3.0
Copper Carbonate
2.0
Bentonite
2.0
Talc
2.0
Total:
111.5

Another book that’s super helpful for Copper Reds, and just about every other glaze at Cone 9-10 is “The Complete Guide to High-Fire Glazes: Glazing and Firing at Cone 10” by John Britt.  Buy this book, seriously.  I learned most of what I know about glazing from this book.  John also describes a bunch of his techniques all over Youtube, here’s a great one for glaze testing:

Easy Glaze Testing (color blend) (part 1)

The images below show the “John’s Red” glaze on stoneware. It’s also important to note that John’s Red glaze is much more vibrant than the above glaze (Copper Red/Elaine Coleman Celadon), which is often liver colored, or muddy brownish red.  I wonder why???

The left image shows John’s Red at cone 9 over Fireclay Stoneware with iron.  I really like these dark burgundy reds, but recently I’ve switched to “Tableware- No Oxide” clay from Continental Clay, which is a white stoneware with very low iron content.  It helps brighten up the reds, like the cup shown on the right.  The rim was also dipped in a Nuka glaze, which ran down the pot during the firing.

Here’s the recipe I’m working with.  It’s John’s Red, but I increased the EPK from 5.4% to 8.4% to stiffen up the glaze for cone 10 firing:
John Britt Red, cone 10
Custer Feldspar
96.4
Whiting
27.2
Silica (325 mesh Flint)
31
EPK
18
Frit 3134
18.2
Talc
7.2
Zinc Oxide
9
Tin Oxide
2.4
Copper Carbonate
1.9
Bentonite
2
Total
213.3

Nuka is an ash glaze.  Check out “Ash Glazes” by Phil Rogers for some great recipes and info on ashes.  Nuka’s are so awesome that they deserve an entirely different blog post, so I’ll just give you the rundown on the recipe I’ve developed over about 2 years.  I get wood ashes from a friend with a wood stove and dry sift them through 12 mesh, then again through 40 mesh.  The glaze recipe changes with the type of wood ash and the sifting process, but here is my current cone 10 recipe…although it’s likely to change because right now it looks a lot better at cone 11:

Nuka, 4/23/12
Wood Ash
33
Custer Feldspar
50
Silica (325 mesh Flint)
30
Whiting
20
Bone Ash
20
Bentonite
10
total
163

Firing is another crucial component to Copper Reds.  Currently I fire in a large natural gas kiln with about 30 cubic feet of stackable space in about 10-11 hours.  I essentially use John Britt’s Reduction 1 firing cycle with a few tweaks.  I fire oxidation until cone 010 drops (about 1700 degrees F) and then do 30 minutes of heavy reduction- the kiln usually stalls in temp.  Then, I fire in mild to medium reduction until cone 10 is very soft.  I’d say more reduction is better than less here. I’ve yet to see adverse effects from over-reducing but I have gotten green from under-reducing.  Lastly, I open the damper and put the kiln into straight oxidation for 30 minutes, until cone 10 drops and 11 is soft- then shut down with the damper closed.  Robert Tichane writes about the importance of peak temp. oxidation for bright reds, and I’ve seen great results with this technique.

Now go mix up some glaze and start chasing the red!