Rustic Pottery, Part 2: Wood Ash Glazes

Guest Posting by Laura Fuller


I’m not Joel, but in third grade, we spent Mrs. Sullivan’s class scheming on the fort we wanted to construct around our desks.  Joel doesn’t remember or deny this, but he does confirm that he had a “fort phase.” Naturally I now write about his pottery.


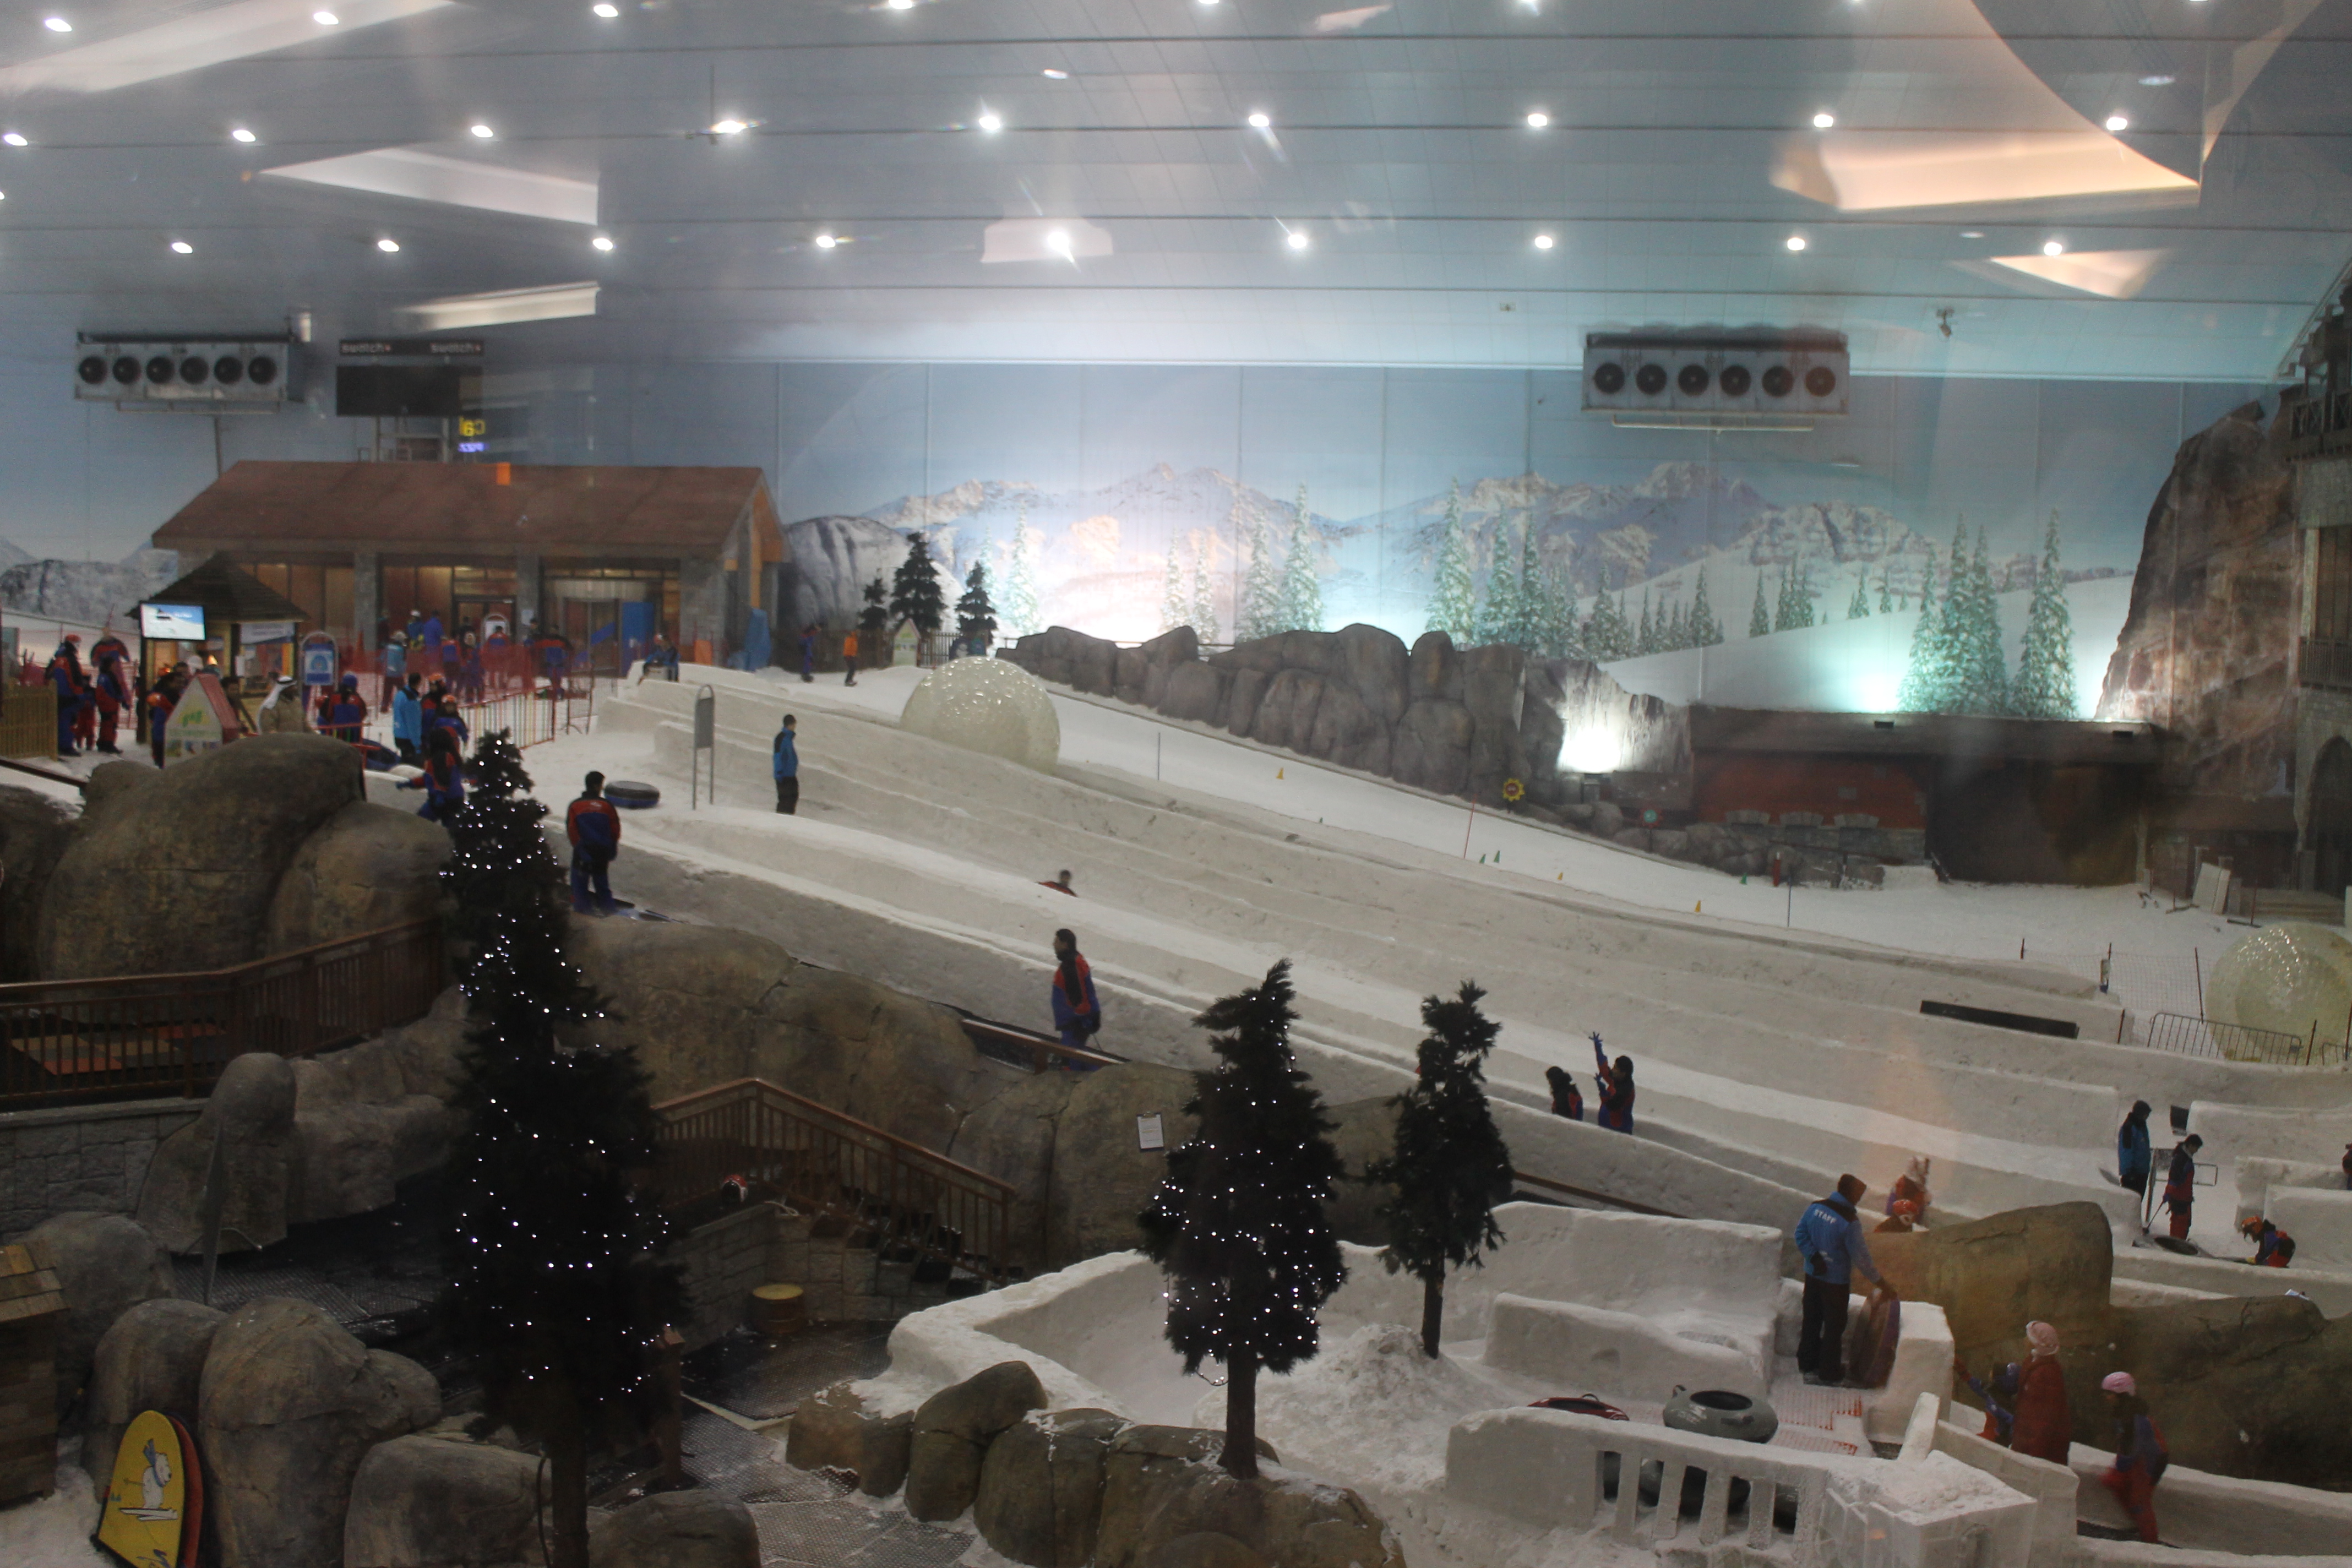
I’ll teach six more weeks in Dubai, UAE, which is ultimately an airport:  Being unsafe takes effort, you can get what you need but with preservatives, and jewels and gadgets of all countries attempt to constitute a style of one’s own.  If flying through O’Hare is not visiting Chicago, being in Dubai isn’t the definitive Middle Eastern experience.

Ski Dubai: Where Arabia goes to ski and shop and the environment goes to die.
Jacques Peak, photo by Joel while skiing at Copper Mt. Colorado.


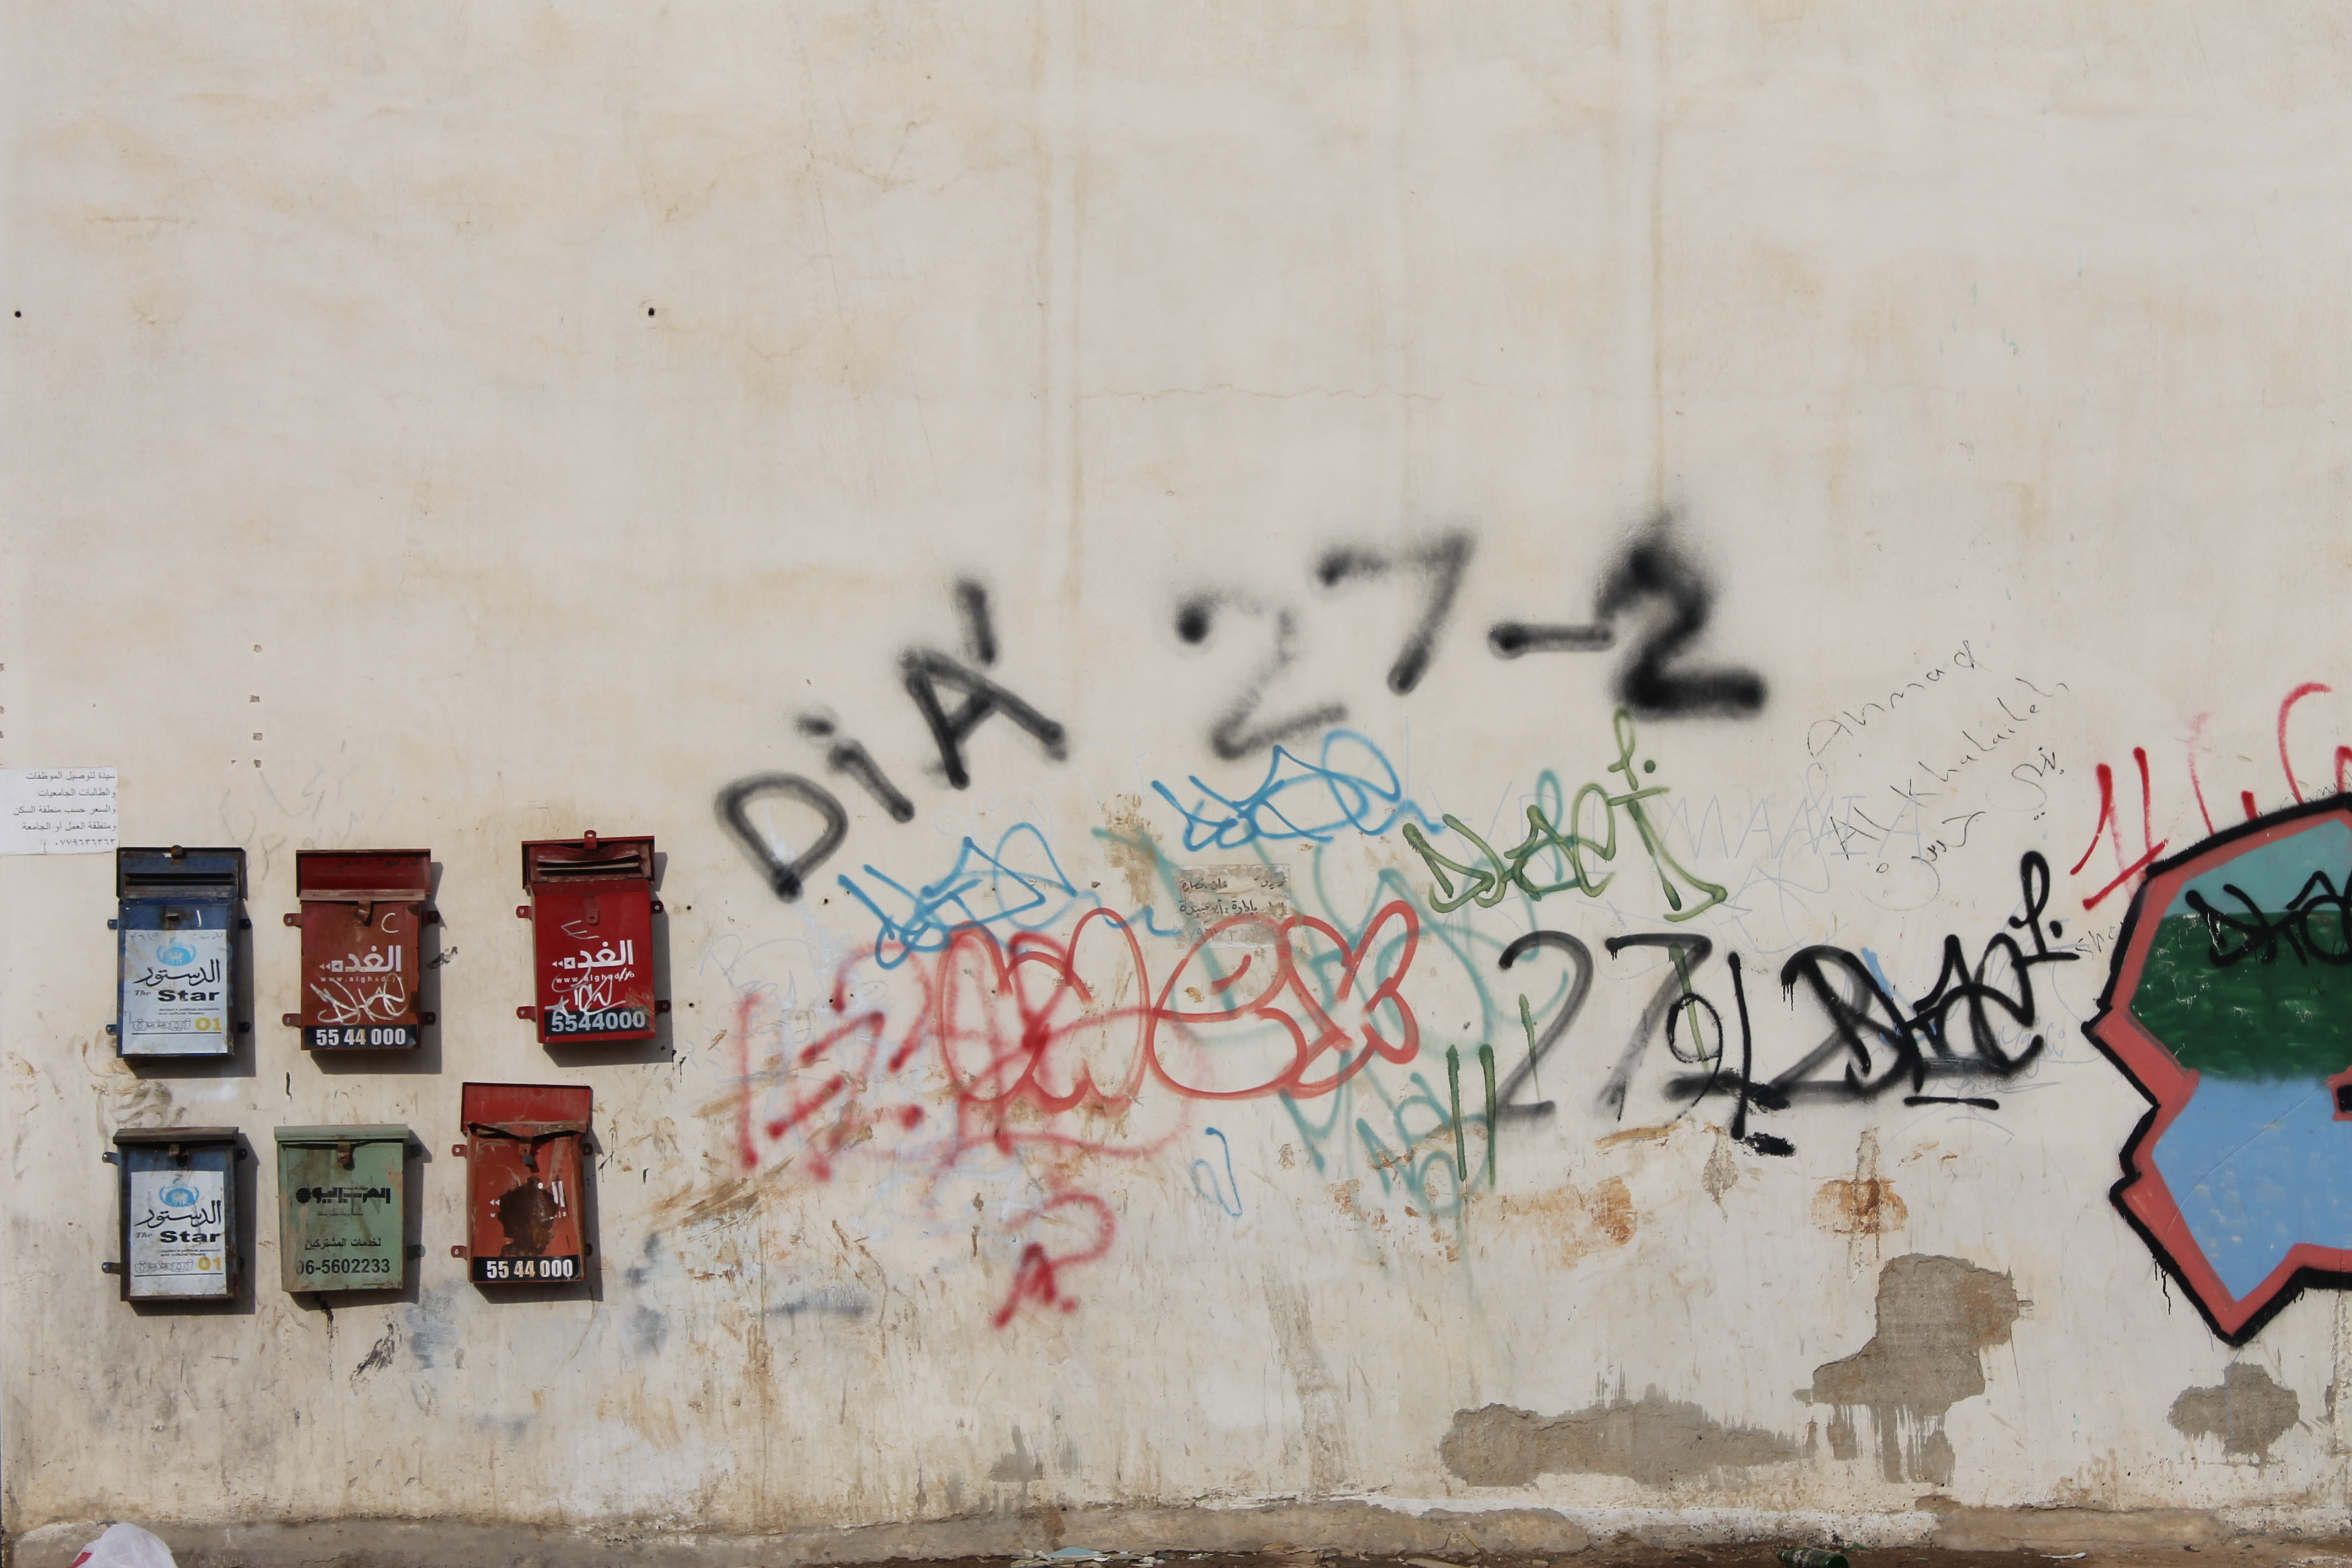
I can’t curse it, though. Safety, convenience, dreamy beaches, solid job, and good friends — not torture. And there are little glimpses of an older-than-me culture here if I bother to look.  You can hear the call to prayer from five mosques at once at Kite Beach.  Graffiti and Iranian merchant ships frequent the creek in Diera.

But these joys are fleeting, up against the cranes, malls, Maseratis and TGIFridays.  It’s mostly contrived to look Arabian. Give the people what they want: stucco, marble, huge doorways–literal smoke and mirrors.  Look at our fancy Arabian-esque mall! It’s just like Arabia, but big! And with retail! It’s like Arabian retail Inception!

People list Dubai’s location as a reason to stay here. “Well, it’s just so easy to travel from here.” The place’s value is attributed to the ease with which residents can escape it? Huh.

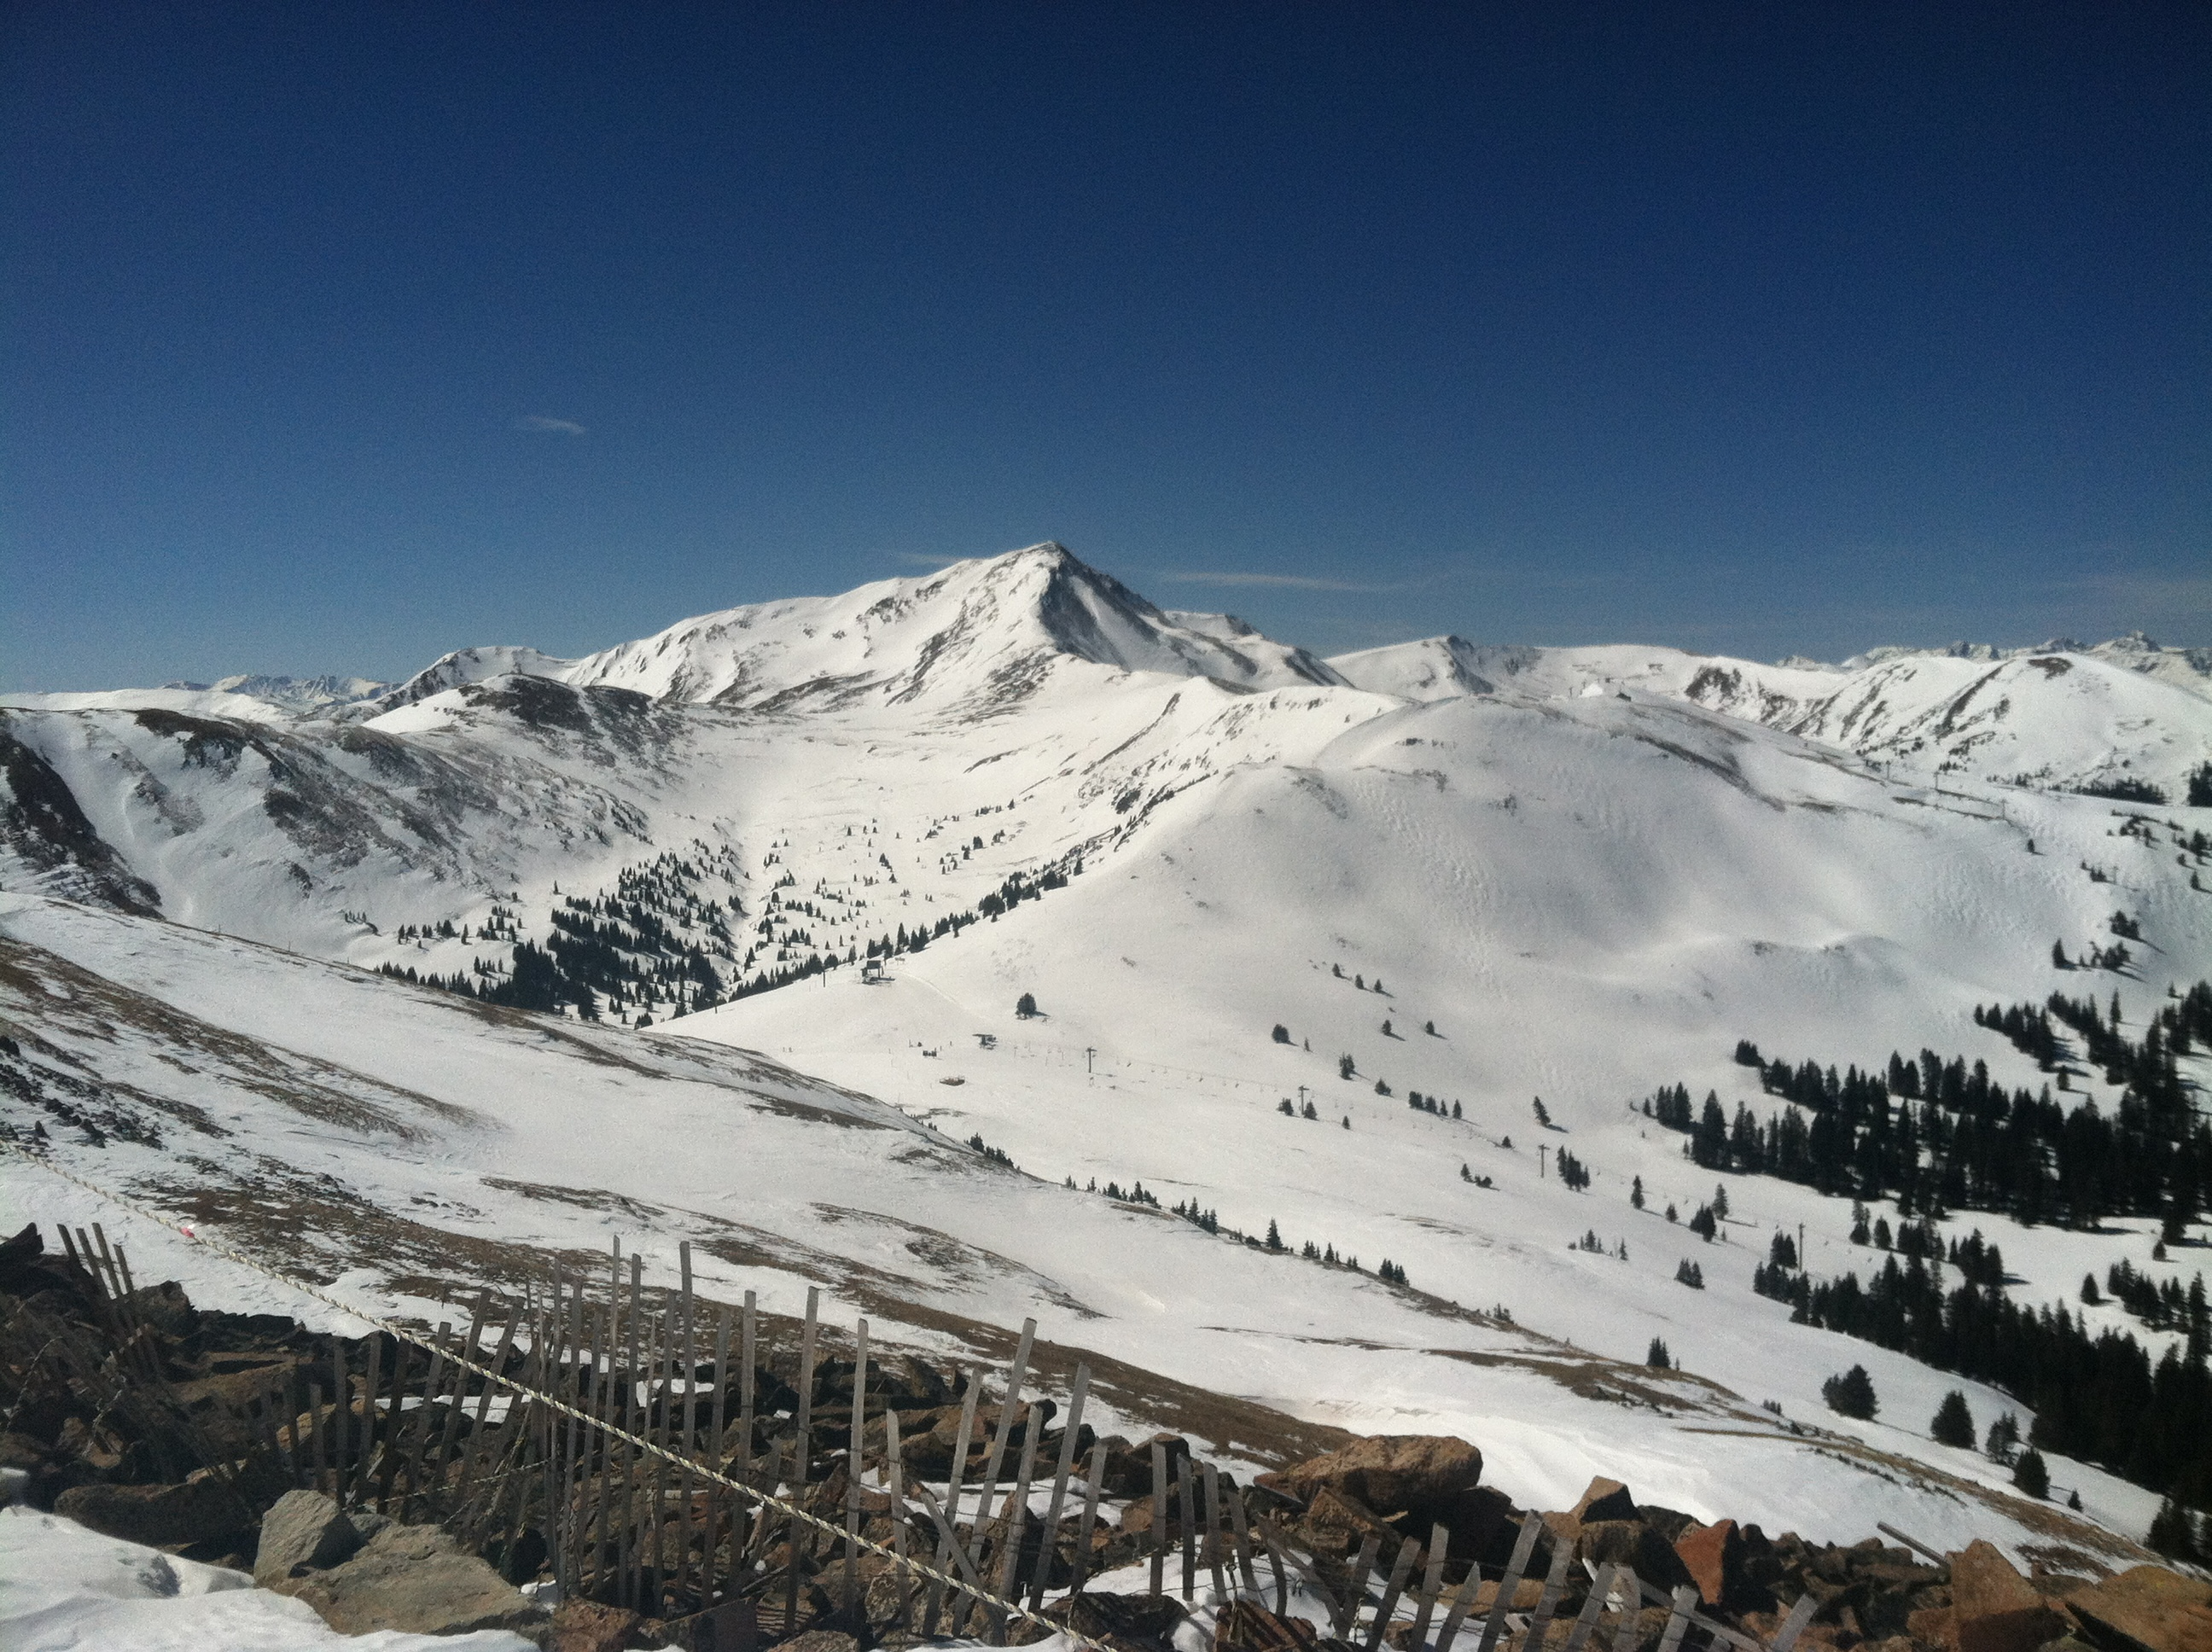
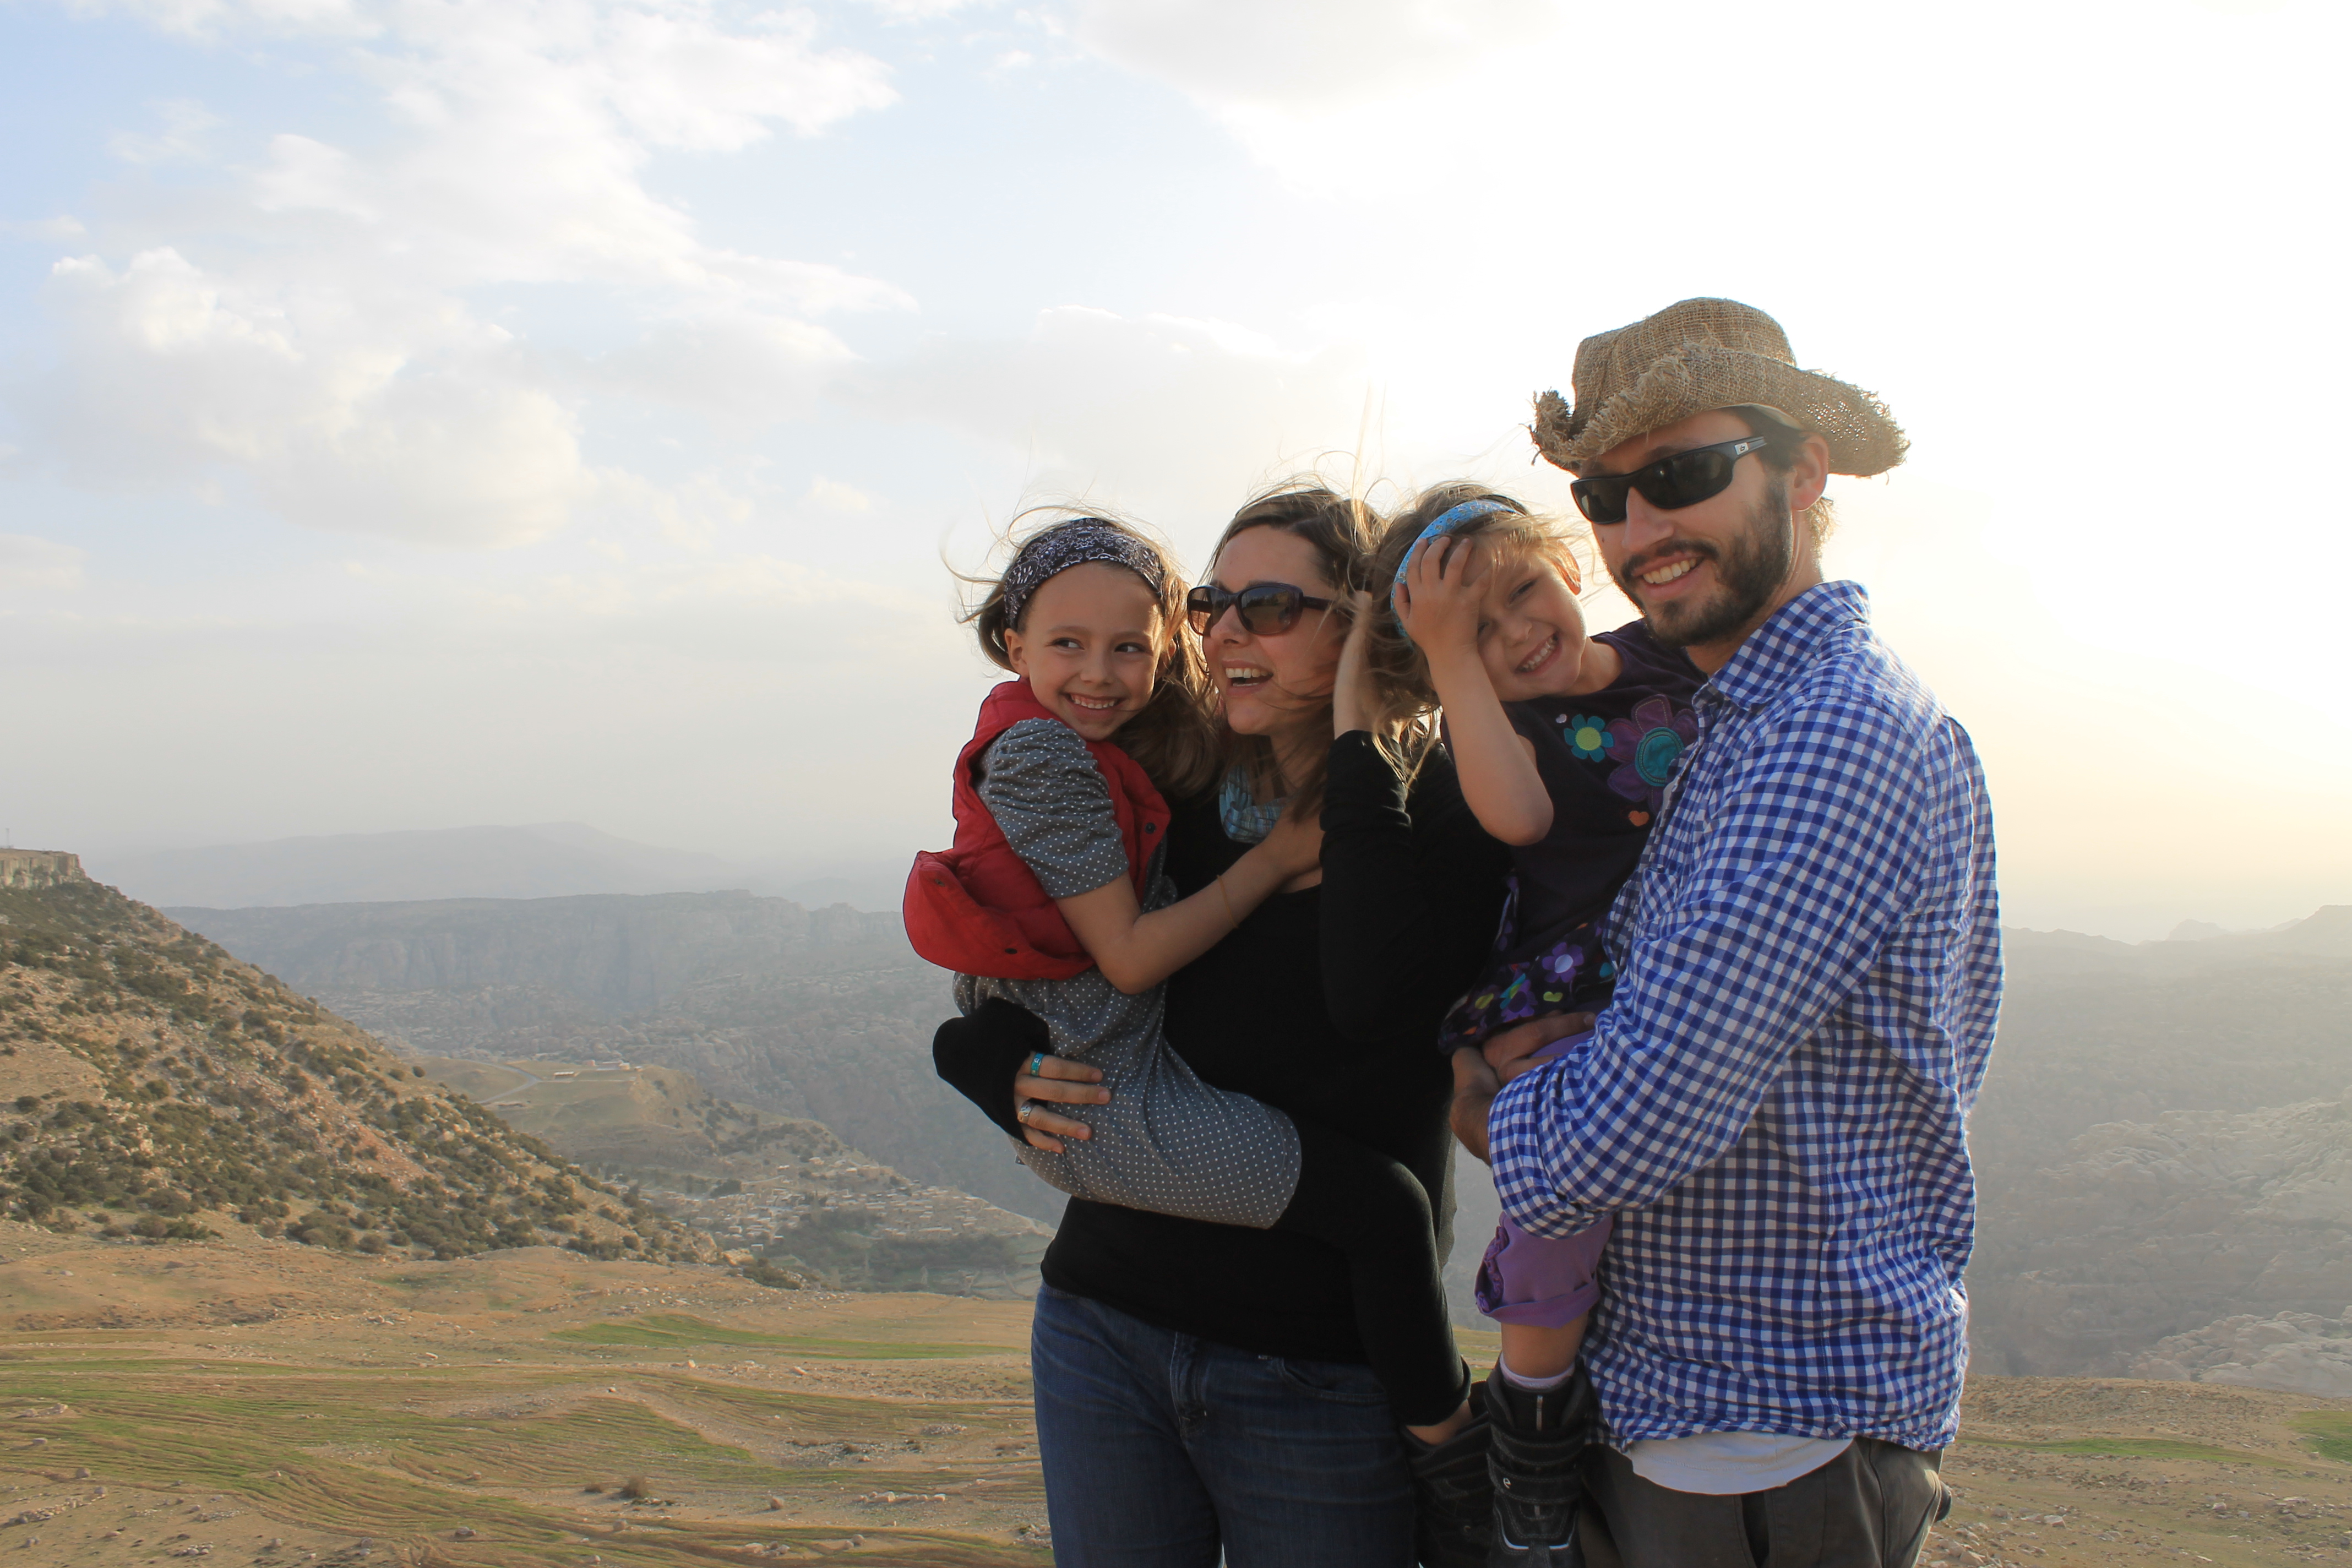
But it’s true. I hopped to Jordan for spring break this year to reorganize my self. I traveled with a kind family of hippies and a lumberjack, the best travel crew I’ve ever known.

Jordan is even more Westerner-friendly than Dubai but doesn’t abandon its culture to be this way.  Like a family dinner instead of a fancy restaurant meal, Jordan offers what it has instead of what it thinks you want: its own food, open air markets, monolingual Arabic signage, and even locals who groom their own facial hair.

The whole week gave off an aroma of chance as we took in seemingly private moments, decidedly uncontrived.  I felt snug and small as I watched them, un-special myself but privileged to see something special, like a rare phenomenon of nature.

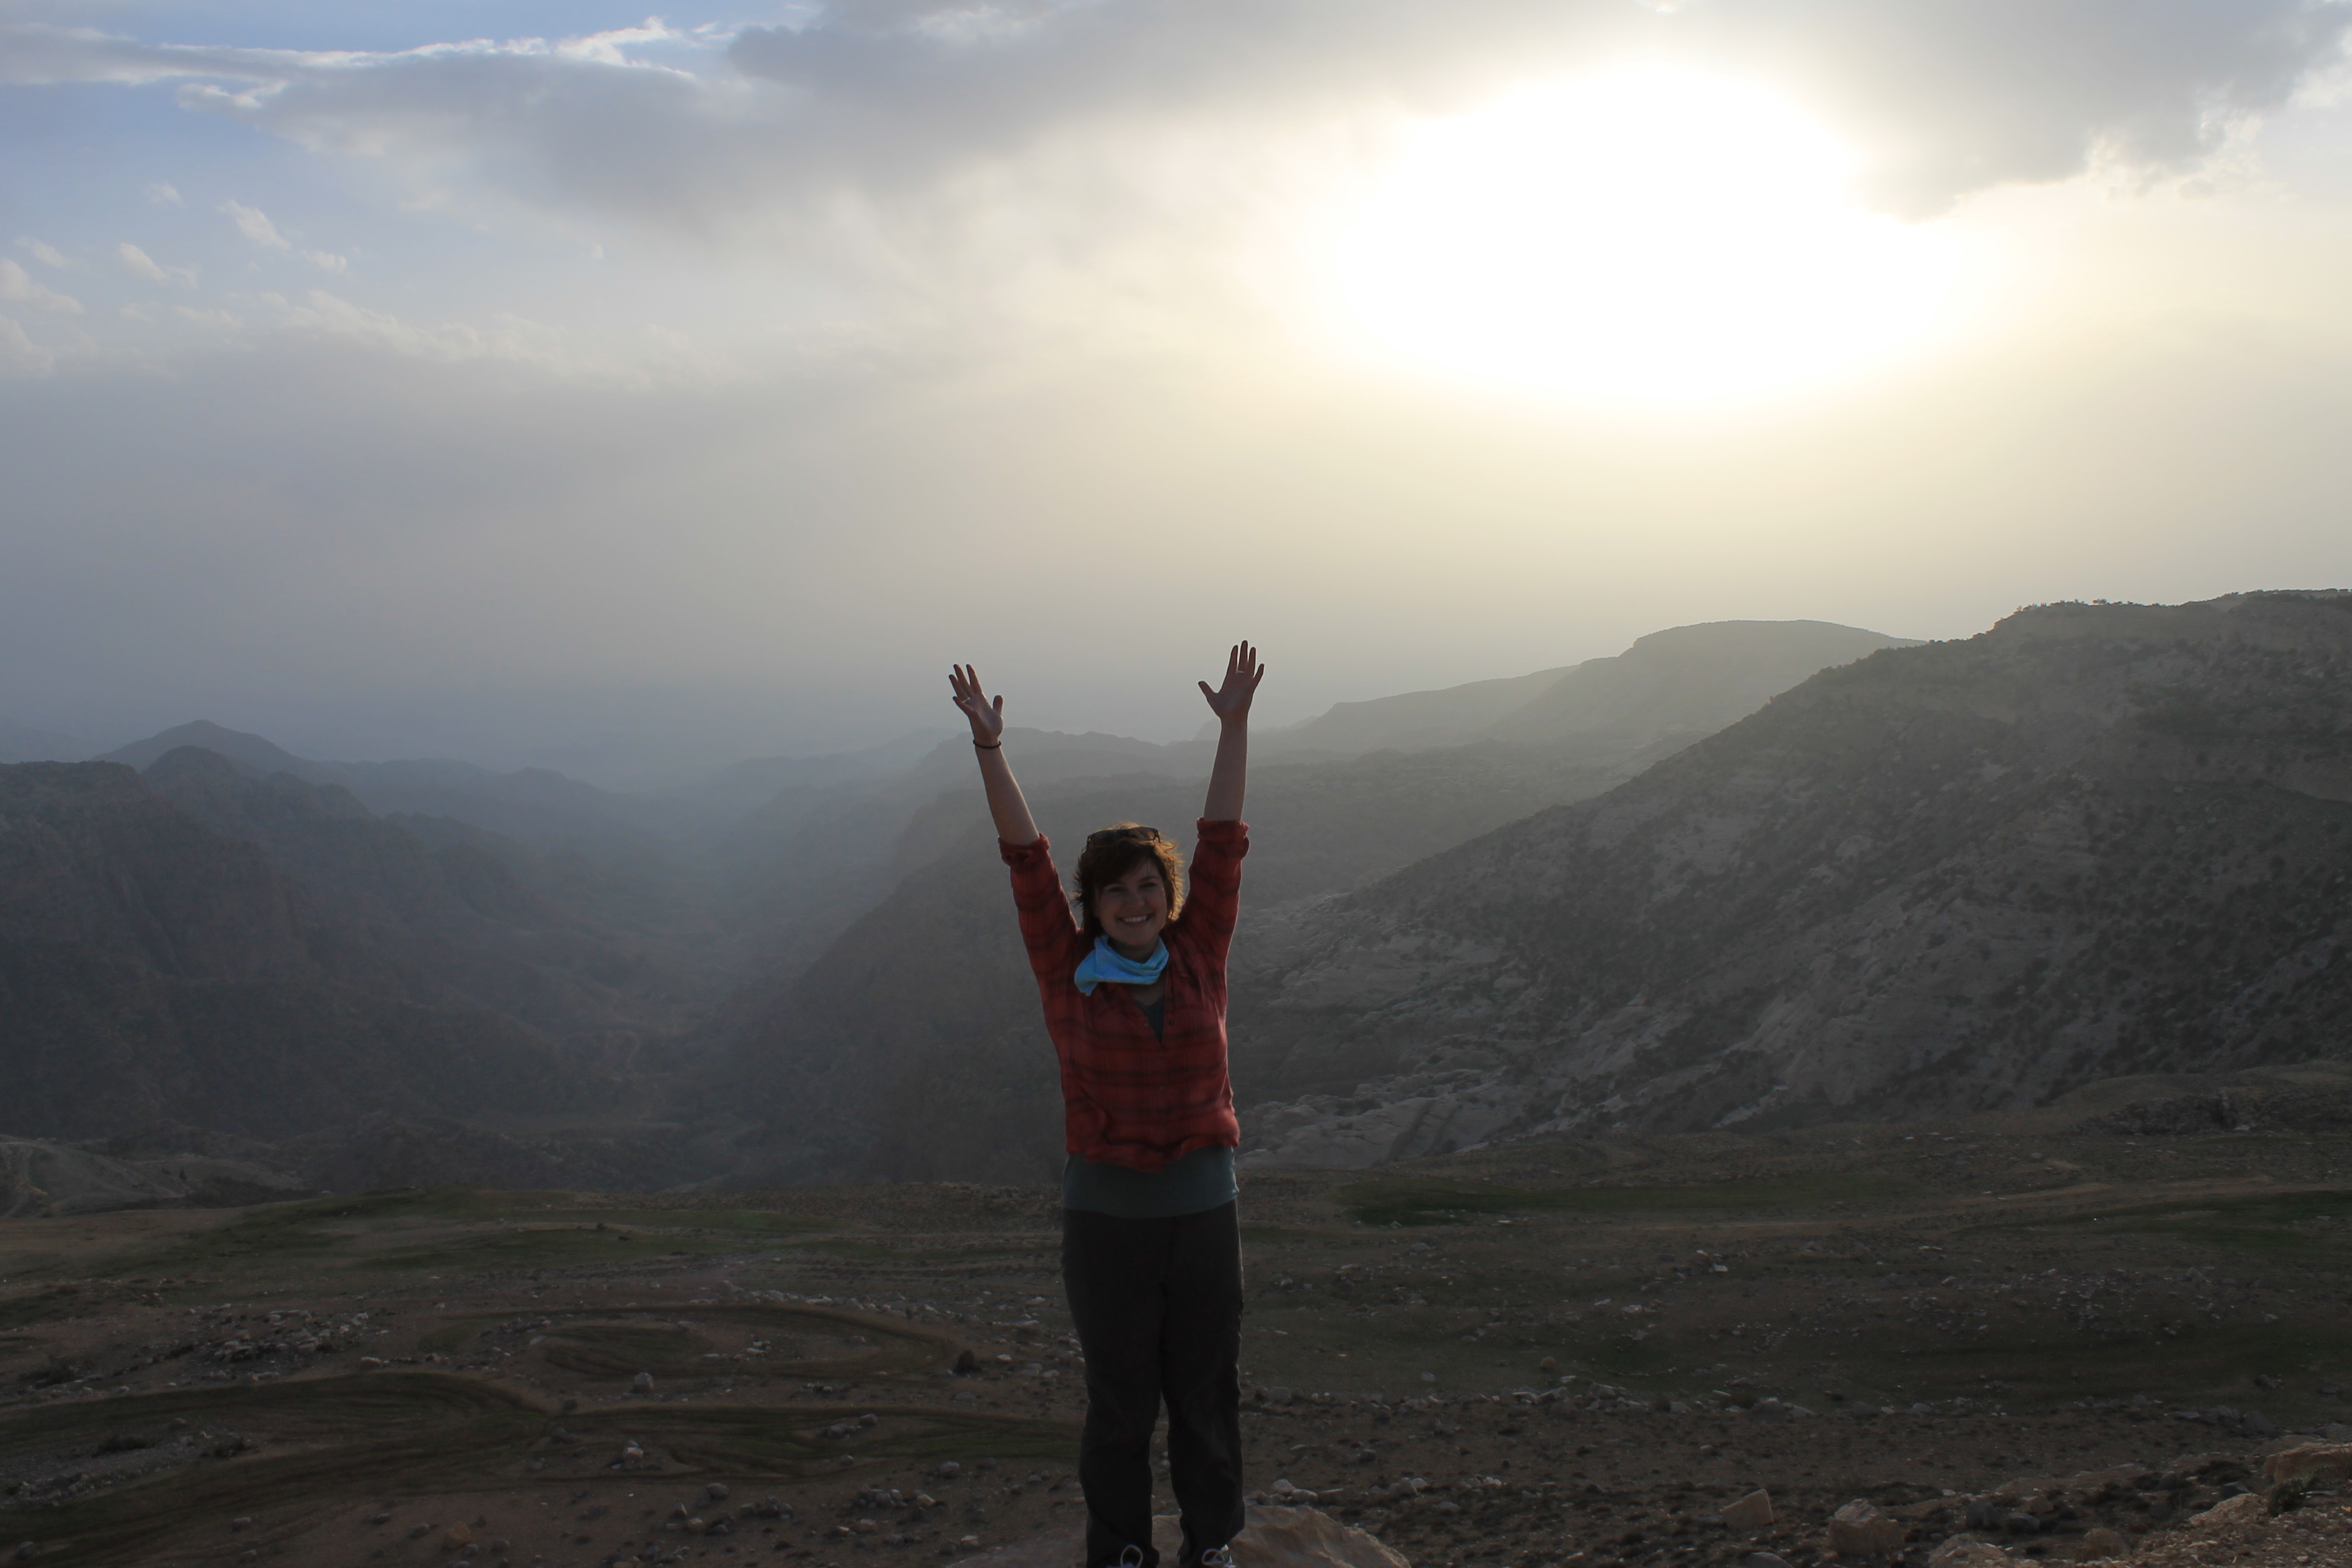
We took a scenic route and would fall short of Petra by sunset.  Hani, driver and guide, consoled us with an iPod adaptor cord.  Banjos and guitars and wailing harmonies crowded into all the van’s empty spaces, and we howled out open windows as the afternoon began to droop. At sunset, we unloaded on the side of the road.  A fresh wind bloomed from a vast gorge.  The sun resolved down in the valley and a mist settled below.  Our hair swirled in the continuous gust, and we laughed our exhilaration, maybe at the implied joke of possibly passing that moment anywhere else. The unexpected wind swept upward, not threatening to knock us into the gorge but to blast us far from it — Southeast Asia, New York, Seattle. We threw our arms wide to catch air that was left off our itinerary.

I slept with my windows open in Petra.  At 4:30 AM I popped awake, panicked by the bullhorn fervor of a grown man hollering at full voice. I laid back down and let the loud, emphatic call to prayer steamroll into the room.  The snoring cut out abruptly from the next bed, startled into a hush. If he was awake he didn’t say anything.  Neither of us rose to shut the window. The curtains undulated with the breeze, giving the illusion that the invitation to prayer was a physical thing, one that could move fabric and make noise and feel cold. I smiled, flat on my back, that someone’s job was to wake us up to be grateful. It would have happened without me. The call would have sounded and Petra’s men would have walked to the mosque with their prayer mats even if I had slept in my Dubai bed.

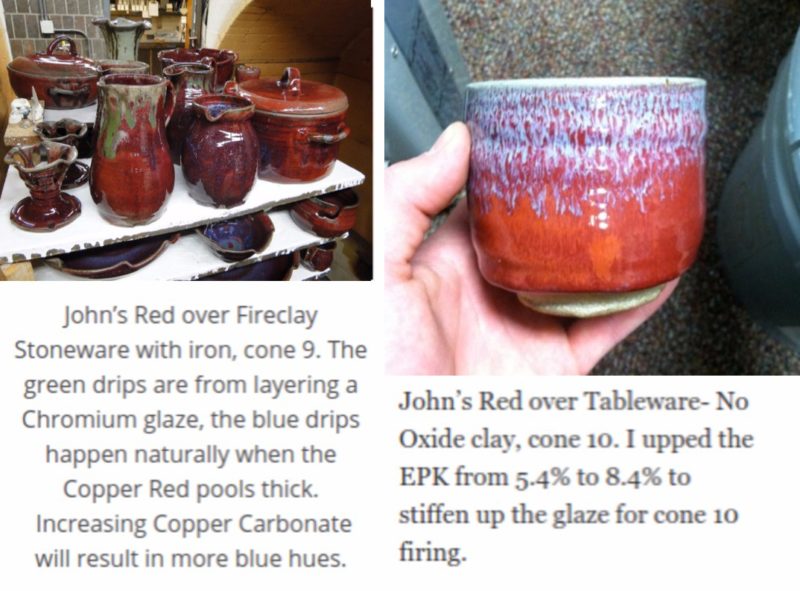
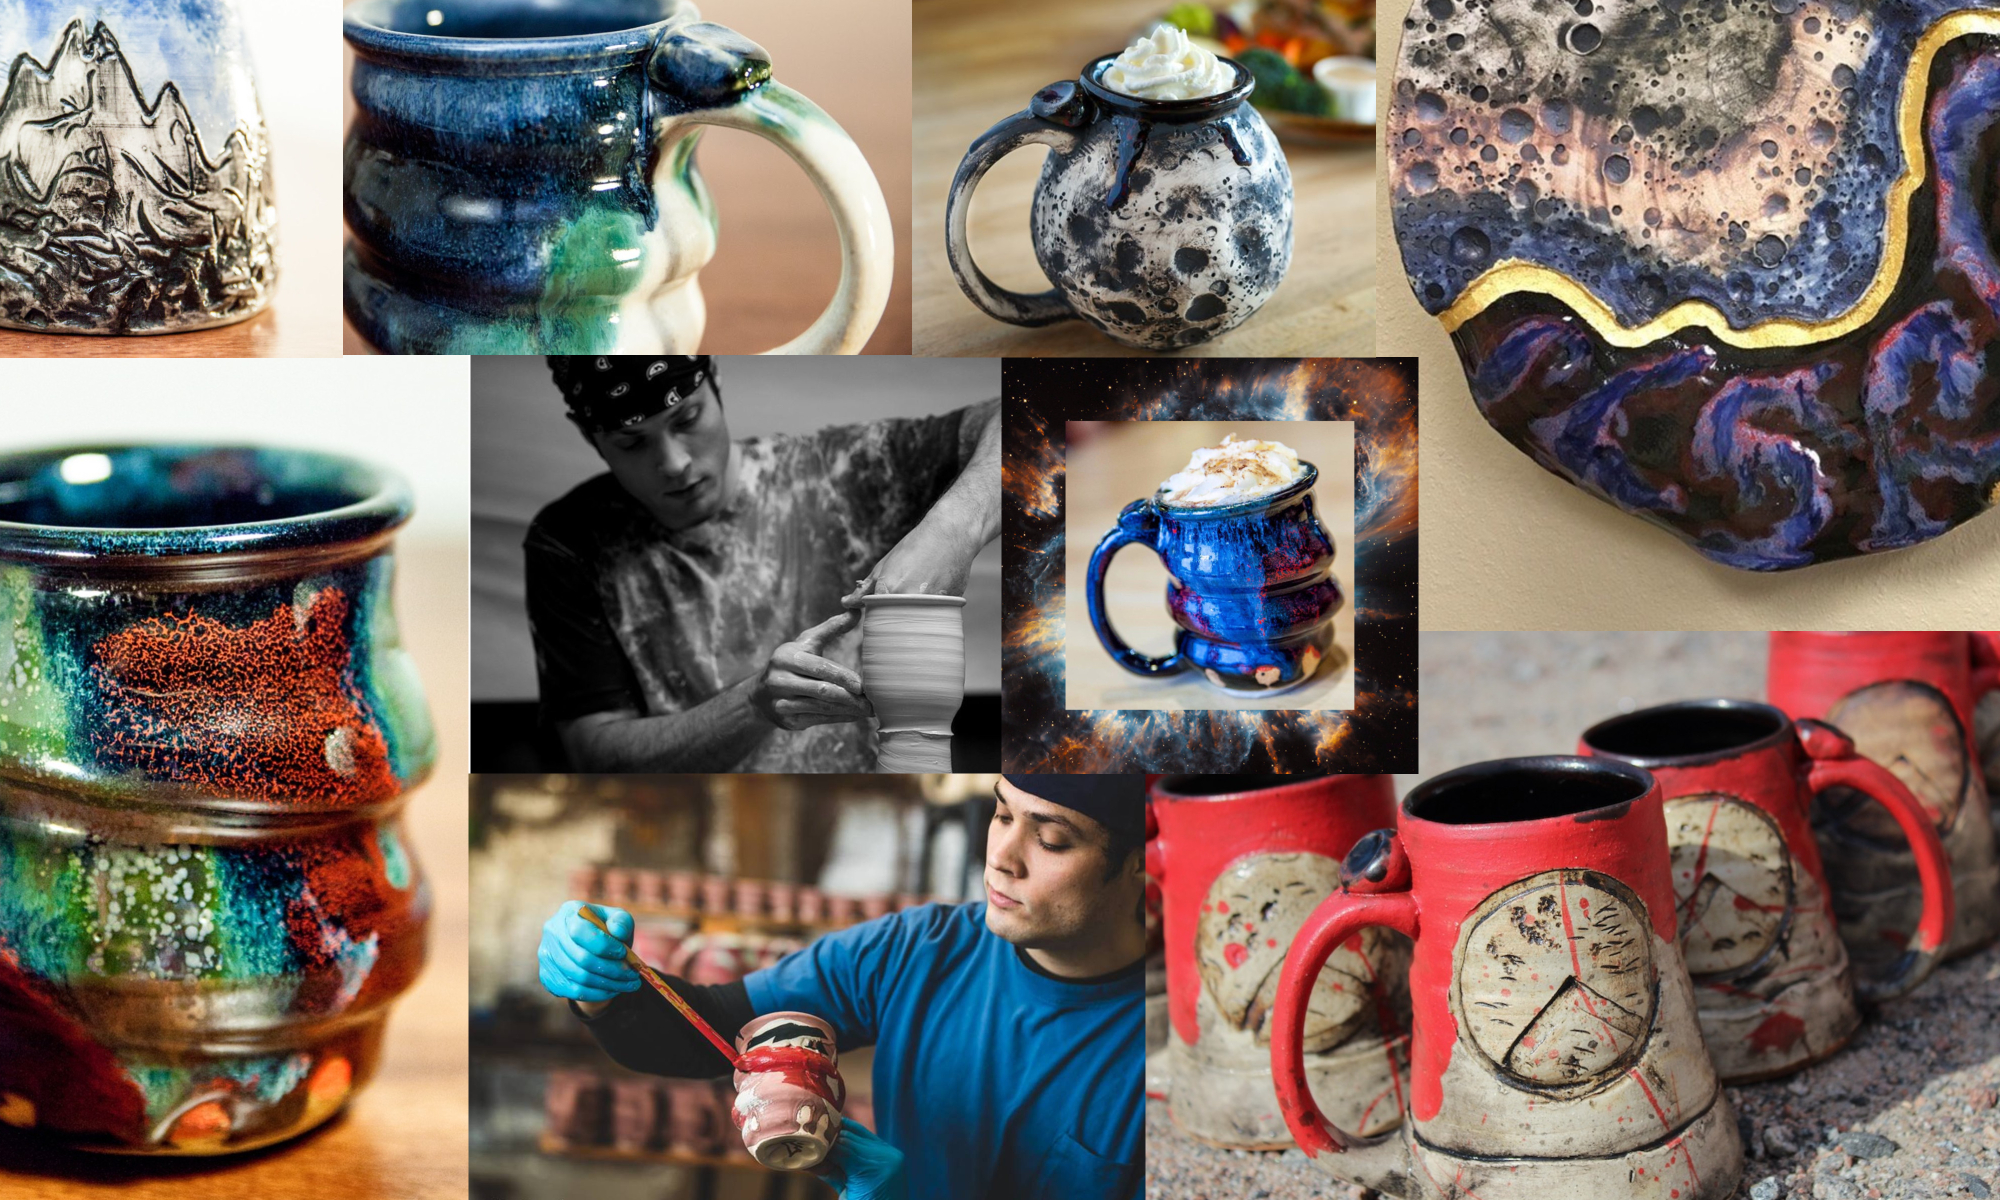
Joel explains two reasons for using wood ashes in his glazes: philosophy and aesthetics.

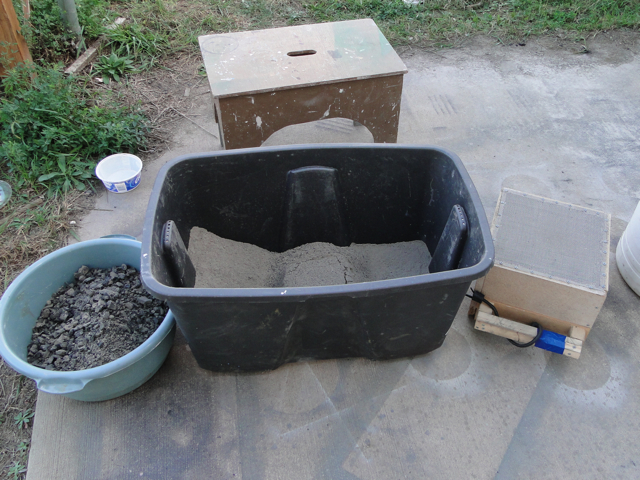
The philosophy bit carries a sense of participation in a community or cycle. His ashes come from a family in Collegeville, MN, who heat their home with a wood burning stove. This wood is entirely deadfall or dying trees, which the family harvests from the St. John’s Arboretum. The ashes then are “an expression of the landscape,” he says. They reflect the types of trees from which they come and where those trees grew.

But wood ashes are harder to work with. It takes “dozens of hours” to sift through them and special glaze chemistry to mix custom glazes, which are ever-changing: “When the ashes change from year to year, so must my glaze recipes. Pine ashes differ from Oak, Walnut, etc.” The trees don’t really care that Joel has a glaze to make.  They live and die on tree watches, and the Nuka glaze takes from them what it can get. The pots that use this glaze are simply reflections of the small moments that Joel catches — a season heavy with pine or oak, a stop on the side of a Jordanian mountain.  Things happen, and sometimes we’re both lucky enough to see them and crafty enough to capture them.


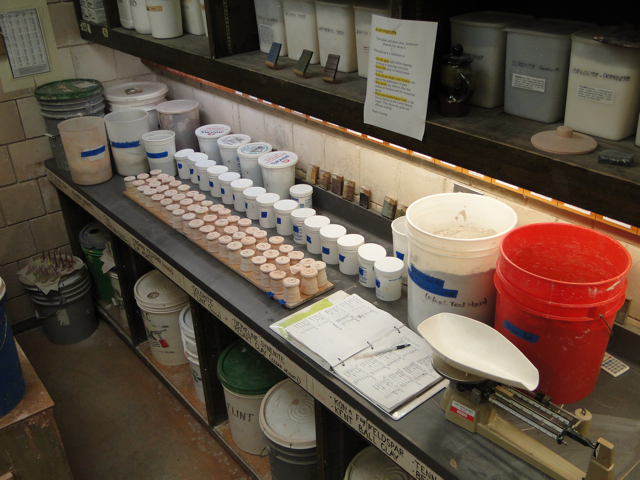
The second bit is the aesthetics.  Joel says of his ashes, “I’m curious how this earthen material often creates an earthen aesthetic.” He points to “complex glaze surfaces, rustic tones, natural color variation, spots, drips, asymmetrical patterns that” remind him of “colors and surfaces in nature.”

He appreciates the unpredictability and experimentalism of every firing when he uses these materials, especially when he incorporates iron, which reacts with the ashes to create dark contrast. The more labor-intensive and unruly work is rewarding.

He boils it down to this: “Constant challenge helps the artwork learn and grow.” I like the idea that the art itself is being challenged, that art learns. I like even more that he goes looking for this challenge because art’s learning is a worthy pursuit.

It’s a human tendency to tuck that learning into a classroom, a box, or a fail-proof glaze formula to use for all time:  This is how we learn about culture. This is how we make the Nuka glaze. But it’s not that simple, and that’s why it’s so valuable.  The end product is at the mercy of all the calls to prayer and winds from Jordanian valleys and fallen Minnesota branches from any family of trees — nothing we can plan or reign over. And the statement that forms won’t ever be said that way again, not for us and not for as long as we live, which makes that mug seem like quite a privilege for your coffee refill, no?

Copper Red Glazes: The Elusive Bright Red Pottery

I’ve been exploring Copper Red glaze recipes for about 2 years now, and I still don’t know exactly what causes the reddest of red glazes.  Some recipes are consistently dull liver color, yet they will blush orange-red from time to time, like the mug pictured to the left.  It was in a firing that did not have enough reduction.   A lot of the pottery was mostly green, like the right side of this mug.   For some reason this pot has an awesome red-orange racing stripe down the side right where the green transitions to red.   Was it because the flame was hitting it in a weird way?  It wasn’t even close to the burner ports….

“Copper Red Glazes” by Robert Tichane is the best resource I’ve found for Copper Reds.   If you want to learn about reds I say read it, then read it again.  He suggested that any base glaze can be adapted to a Copper Red glaze by adding 2% Copper Carbonate and 3% Tin Oxide and then firing in a reduction atmosphere.  This inspired the above glaze, which was originally an Elaine Coleman Celadon that I found in an old Ceramics Monthly.  I added the Copper and Tin, as well as a bit of EPK to raise it from cone 9 to cone 10.  Here’s the recipe, and don’t forget to glaze very thick!!

Copper Red/Elaine Coleman Celadon
Whiting
21.0
Custer Feldspar
25.0
EPK Kaolin
20.0
Silica (325-mesh)
25.0
Ferro Frit 3134
8.8
Zinc Oxide
2.7
Tin
3.0
Copper Carbonate
2.0
Bentonite
2.0
Talc
2.0
Total:
111.5

Another book that’s super helpful for Copper Reds, and just about every other glaze at Cone 9-10 is “The Complete Guide to High-Fire Glazes: Glazing and Firing at Cone 10” by John Britt.  Buy this book, seriously.  I learned most of what I know about glazing from this book.  John also describes a bunch of his techniques all over Youtube, here’s a great one for glaze testing:

Easy Glaze Testing (color blend) (part 1)

The images below show the “John’s Red” glaze on stoneware. It’s also important to note that John’s Red glaze is much more vibrant than the above glaze (Copper Red/Elaine Coleman Celadon), which is often liver colored, or muddy brownish red.  I wonder why???

The left image shows John’s Red at cone 9 over Fireclay Stoneware with iron.  I really like these dark burgundy reds, but recently I’ve switched to “Tableware- No Oxide” clay from Continental Clay, which is a white stoneware with very low iron content.  It helps brighten up the reds, like the cup shown on the right.  The rim was also dipped in a Nuka glaze, which ran down the pot during the firing.

Here’s the recipe I’m working with.  It’s John’s Red, but I increased the EPK from 5.4% to 8.4% to stiffen up the glaze for cone 10 firing:
John Britt Red, cone 10
Custer Feldspar
96.4
Whiting
27.2
Silica (325 mesh Flint)
31
EPK
18
Frit 3134
18.2
Talc
7.2
Zinc Oxide
9
Tin Oxide
2.4
Copper Carbonate
1.9
Bentonite
2
Total
213.3

Nuka is an ash glaze.  Check out “Ash Glazes” by Phil Rogers for some great recipes and info on ashes.  Nuka’s are so awesome that they deserve an entirely different blog post, so I’ll just give you the rundown on the recipe I’ve developed over about 2 years.  I get wood ashes from a friend with a wood stove and dry sift them through 12 mesh, then again through 40 mesh.  The glaze recipe changes with the type of wood ash and the sifting process, but here is my current cone 10 recipe…although it’s likely to change because right now it looks a lot better at cone 11:

Nuka, 4/23/12
Wood Ash
33
Custer Feldspar
50
Silica (325 mesh Flint)
30
Whiting
20
Bone Ash
20
Bentonite
10
total
163

Firing is another crucial component to Copper Reds.  Currently I fire in a large natural gas kiln with about 30 cubic feet of stackable space in about 10-11 hours.  I essentially use John Britt’s Reduction 1 firing cycle with a few tweaks.  I fire oxidation until cone 010 drops (about 1700 degrees F) and then do 30 minutes of heavy reduction- the kiln usually stalls in temp.  Then, I fire in mild to medium reduction until cone 10 is very soft.  I’d say more reduction is better than less here. I’ve yet to see adverse effects from over-reducing but I have gotten green from under-reducing.  Lastly, I open the damper and put the kiln into straight oxidation for 30 minutes, until cone 10 drops and 11 is soft- then shut down with the damper closed.  Robert Tichane writes about the importance of peak temp. oxidation for bright reds, and I’ve seen great results with this technique.

Now go mix up some glaze and start chasing the red!

BIG Pottery: Coil Building and Stacked Sculptures

Coil building was one of the first pottery techniques I learned, but it’s not something I do everyday or even every month. I like to use coil building for HUGE pots that are too big to throw.

I generally throw the bottom of the pot as big as I can, usually with a 20-40 pound lump of clay. The image on the left shows a pot that was thrown from 25 lbs. of clay and about 12 inches high, before I coiled up another 12 inches.

It’s a lot easier to coil a narrow shape than a wide shape, as wider pots tend to get off-center and want to collapse. I add the coils on top of each other by pinching the new coil into the clay below. My thumb leaves an interesting pattern from this process, and I generally keep this texture as decorative banding lines in the large jars. The image on the bottom left shows the coils after they have been smoothed together. You can see how the smoothing process also begins to form the pot’s profile.

Compared to throwing a pot on the wheel in a matter of minutes, coil building is a much slower process.  The profile of the pot forms over a matter of hours, as the 2-3 foot long coils are individually rolled out and successively added on top of each other.  The pot below was made with extremely thick coils to form a planter.


I started with a 35lb. mound of clay for the bottom, thrown 1.75 inches thick.  I left a hole in the middle for water drainage in the finished planter.  Then, I rolled 2 inch thick coils and paid careful attention when smoothing them together.  The finished planter used about 410 lbs. of clay and with the help of some Red Hot Chili Peppers on shuffle, this pot formed in just under 5 hours.  About 100 lbs. of water will evaporate from the clay before the firing, hopefully over the course of 2-3 months to avoid drying cracks.

Another way I often build BIG pots is by throwing pottery shapes, like large bowls and cylinders, and stacking them on top of each other. These combination stacks grow a lot faster but I tend to make these pieces a bit smaller and reserve coil building for the huge pots.

Glaze testing at JD Jorgenson Pottery

I’ve spent the past week and a half firing the small gas kiln at JD Jorgenson Pottery, in order to accomplish a couple things with the Nuka glaze.  At the St. Ben’s ceramics studio, I fired the glaze to cone 12 flat, almost cone 13 (about 2410 degrees F).  At these temperatures, it takes a long time and huge amount of energy to raise even a single degree.  It’s also harder on the kiln, shelves, and clay so it made a lot of sense to try and lower the temperature of the Nuka glaze before my new body of work.

The kiln at JD’s place was made from the shell of an old electric kiln that I salvaged from a high school in Sartell, MN.  They kept the electric box, so JD cut 2 small holes in the bottom of the soft brick to make burner ports.  Firing with gas instead of electricity will also let us test reduction firings very similarly to larger gas kilns.  These practice firings willhelp me for adapting to the Paramount Arts Center gas kiln, which I’m firing for the first time this Monday.  Fresh pots should be out by Art in Bayfront Park the next weekend in Duluth!

My first firing in this kiln was actually the second time JD fired it, and we got some really nice results.  The glaze fluxed out pretty well at cone 10 (that was our goal) but the bottom of the kiln only reached cone 9.  Also, even at cone 10 there were bubbles present in the glaze.  The Nuka contains wood ashes, which are high in alkali.  Something about the alkali cause bubbling in the glaze at high temperature, and the finished pottery had sharp holes and pits.  Problems like this are common when working with earthen materials, but the struggle is well worth the rustic tones and philosophies behind working from a waste stream system.

Here’s a few finished pots from the 2nd kiln firing, as well as some underfired ones.  The pieces on top are almost perfect, except for the bubbling where the glaze pooled.


JD and I learned a lot from these pots, but with a 22 hour firing into the night I wasted a lot of time and energy with the stalled out kiln.  The barometric pressure changes every night, and this generally makes it difficult to gain temperature.  Once the sun went down, we were at the mercy of the kiln to go at it’s own pace.  Night firing makes for some cool pictures, but a miserable next morning.

Right now I’m in the middle of the 3rd firing and the kiln is at cone 5 (almost 2200 degrees F).  Once it gets to cone 10, I plan to soak for at least 2 hours, so the bubbles will pop and the glaze will seal over.  At 6 hours in, we’re really close to peak temp and the soak period so things are looking good…definitely better than another firing into the weee hours of the morning uuhg…and hopefully the pots will turn out looking close to this good!